Kubecost Brings Advancements to Your Saved Reports Through Scheduling and New Cost Center Reporting
Kubecost has just launched v1.104 this month, and as usual, we are providing new ways to analyze your spend data, and also distribute that information in convenient methods to those who need access. Our two spotlight examples will be report scheduling, a way of distributing different report types to your team via email, and cost center reports, a new report type that intersects your Kubernetes workload costs with cloud billing data. This blog will provide demos of both features. If you want to follow along, make sure you’ve installed Kubecost first before we get started!
Report scheduling
Kubecost has continued to expand Report functionality with a new report scheduling feature. Reports could previously only be accessed from the Kubecost UI, but now you can distribute reports in a routine way via email. These scheduled reports can regularly query your infrastructure across Allocations, Assets, and Cloud Costs and send that information to everyone and anyone on your team.
Sending out a scheduled report
We’ll now show you how to schedule a report. Begin by visiting the Reports page in your Kubecost UI, and locate the report you want to schedule. Under the Actions column, select the three horizontal dots, then select Schedule Report. A new window opens where you will provide the details of your schedule:
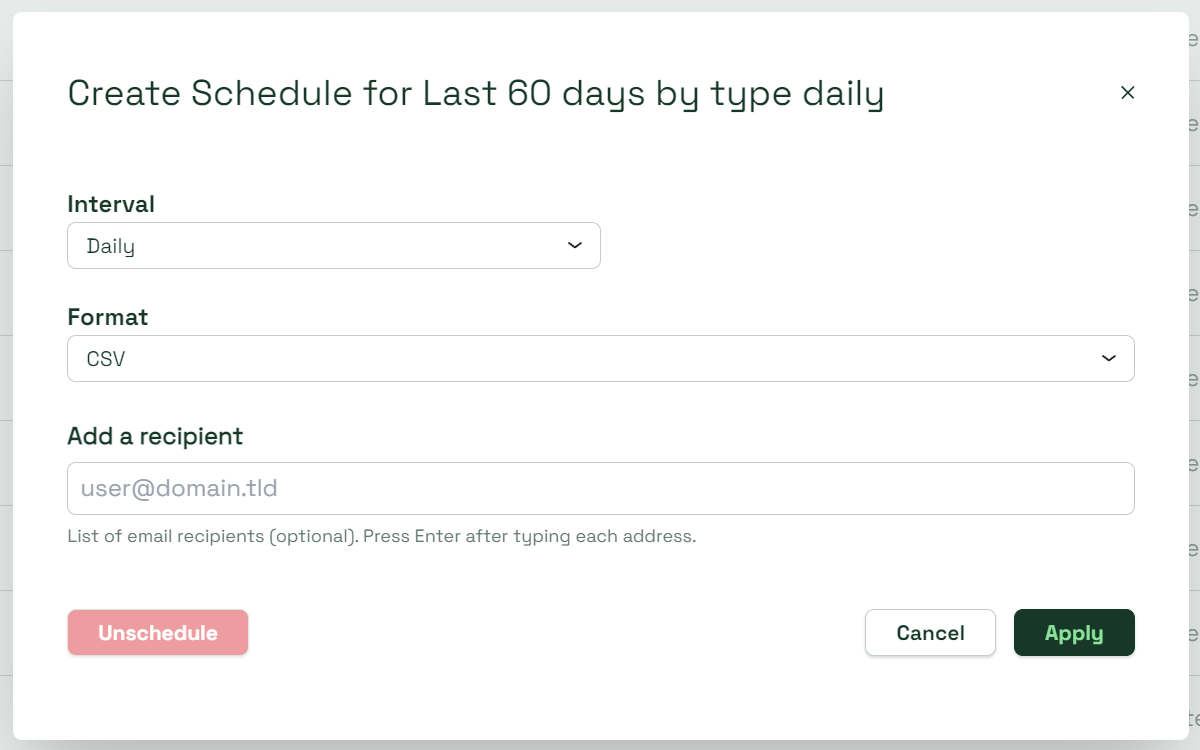
- Interval: How often do you want your report to go out? We support Daily, Weekly, and Monthly options. Weekly allows you to also select your day of the week at midnight to send the report. Monthly will naturally let you choose the day of the month.
- Format: Export as CSV.
- Add a recipient: For email distribution, include all emails or mailing lists you want to distribute your scheduled report to.
Finally, select Apply. If you ever want to cancel an existing scheduled report without deleting the report itself, return to the window and select the Unschedule button.
Cost center reports
In 1.104, Kubecost also introduced a brand new advanced report called a cost center report (CCR). Users of our existing advanced reporting feature have asked for greater flexibility when it comes to creating custom groups with intersecting Kubernetes allocation costs and out-of-cluster (OOC) costs; CCRs are here to do just that. CCRs allow you to create multiple cost centers, with separate aggregations for your Kubernetes workload costs and cloud costs, as well as filtering for specific resources. Keep reading for an in-depth guide to creating your first CCR:
CCRs, like other report types, can be created from the Reports page. Select Create a report, then select Advanced Report - Cost Centers. You will be taken to the Cost Center Report page.
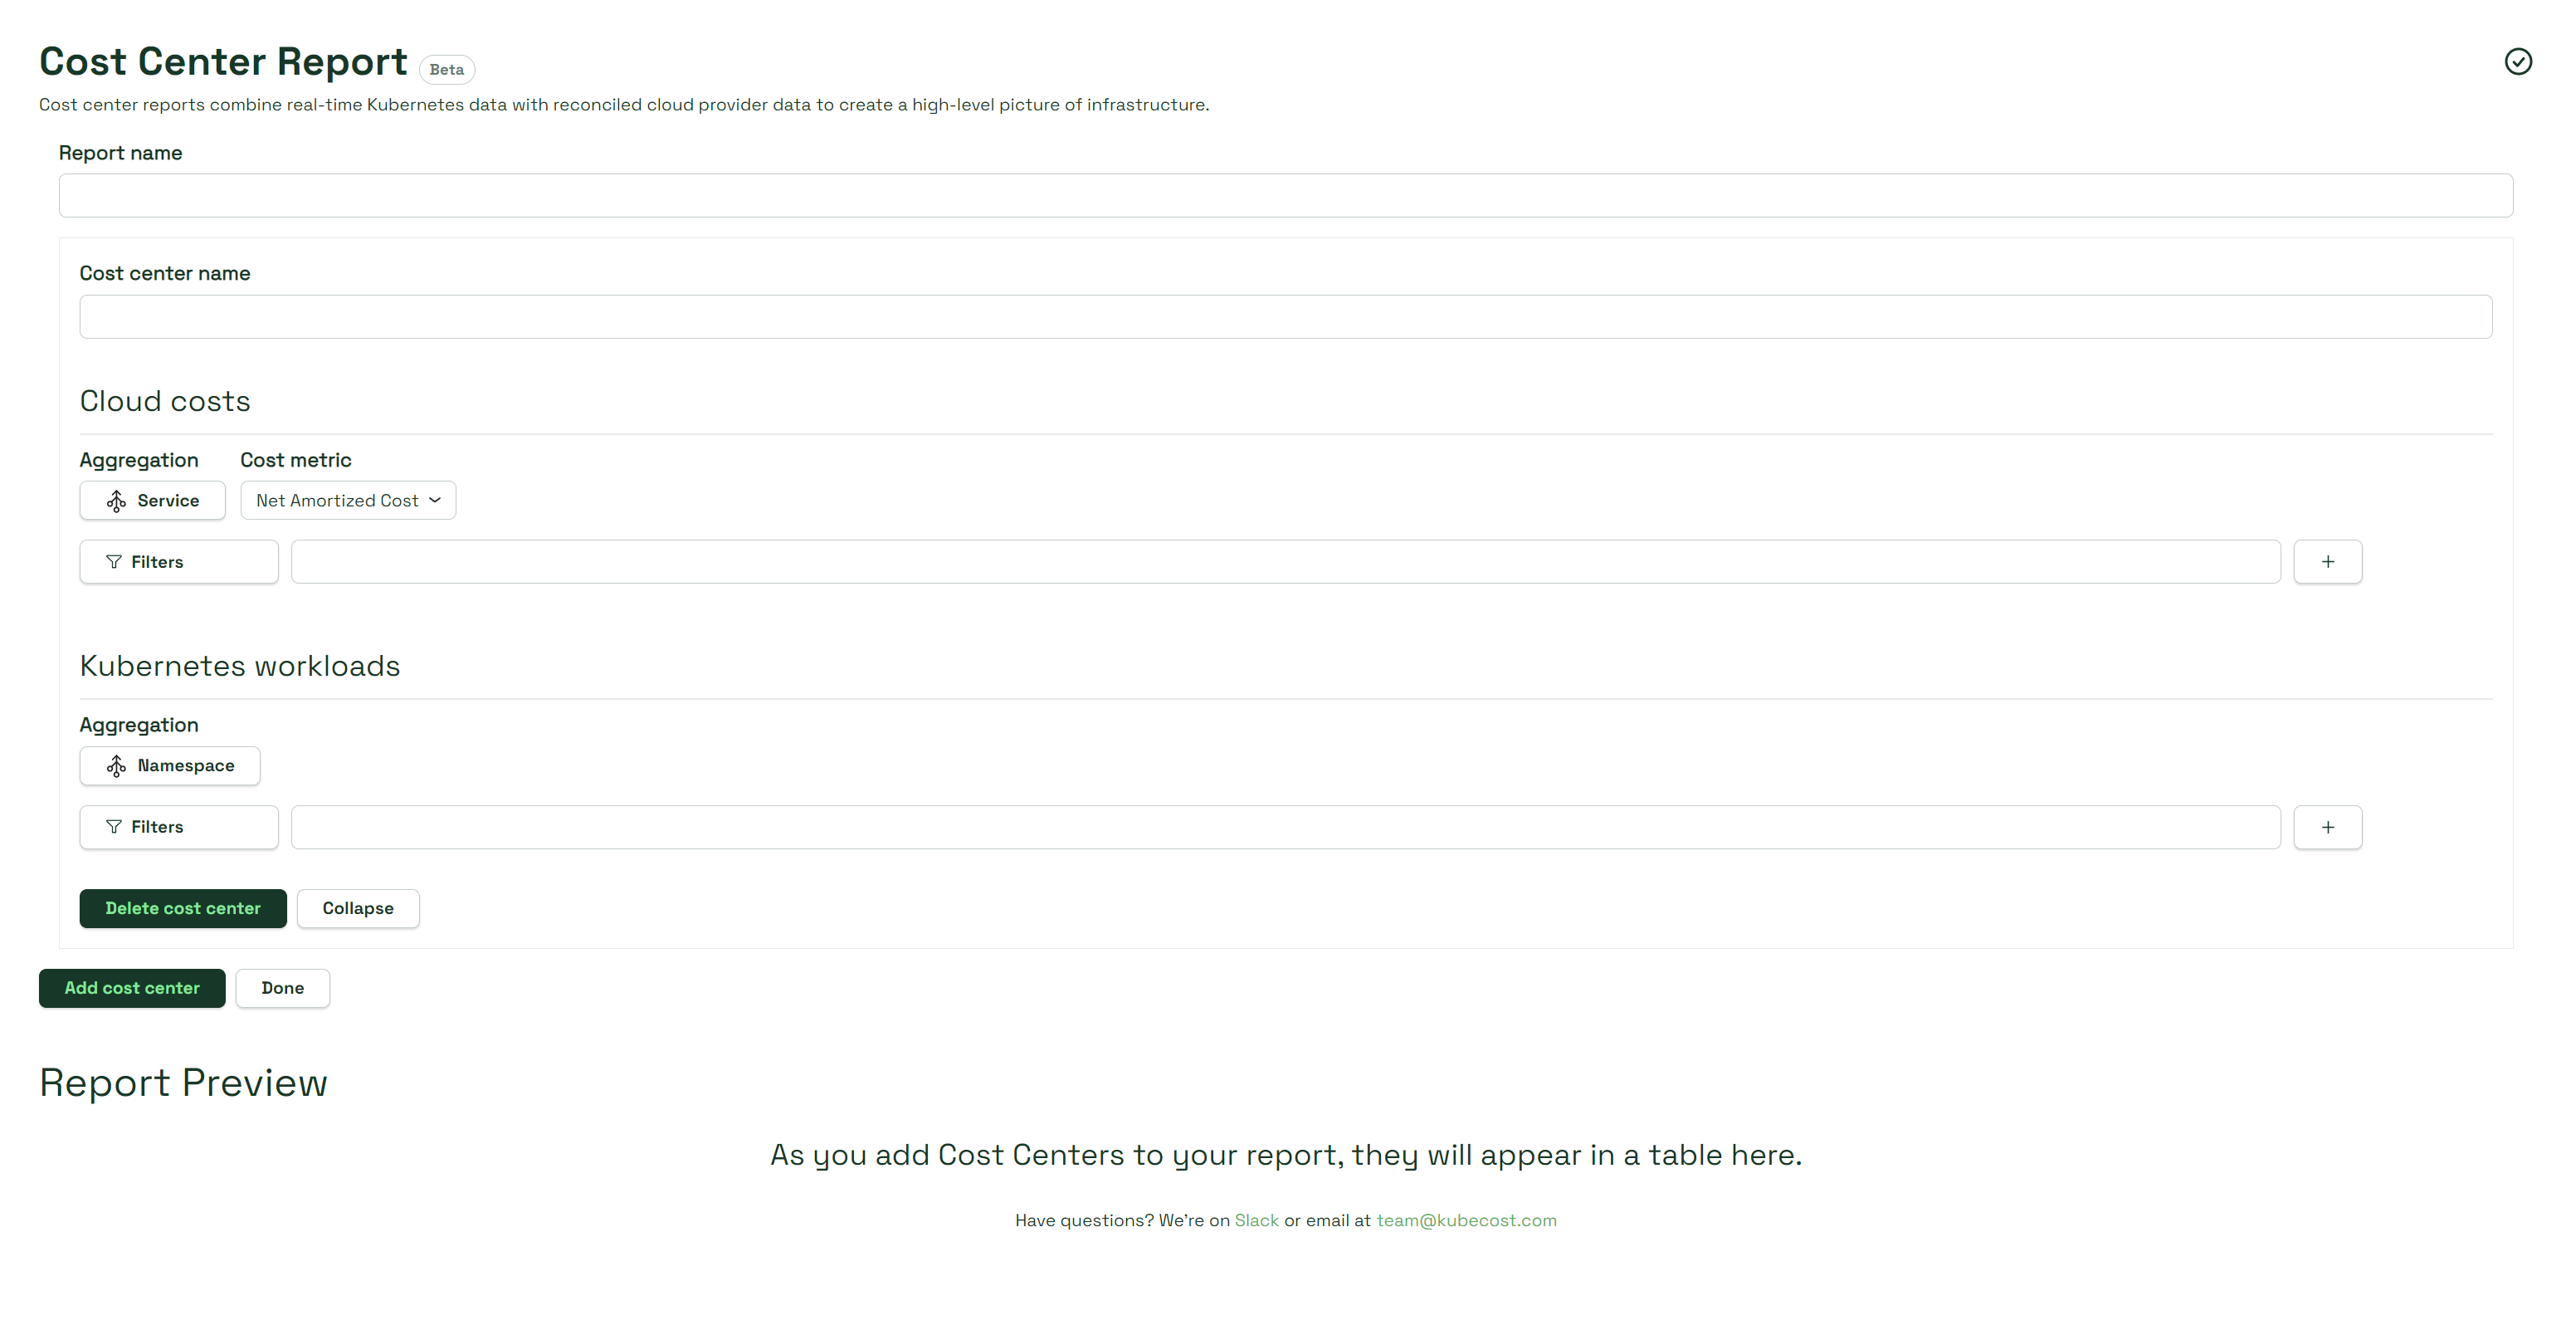
Provide a name for your CCR under the Report Name, then we will get started on configuring your first cost center. A single CCR is able to contain multiple cost centers which can all be configured differently. This allows for versatile assessment of your miscellaneous allocation and cloud costs.
Choose a name for your first cost center. Then you can begin configuring the details of your cloud Costs. you can choose from one or several different categories to aggregate by: we support both single and multi aggregation for maximum configuration flexibility. Next, choose your cloud cost metric type. Different cost metrics may provide different results based on your cloud service provider (CSP), as can be read about in our Cloud Cost Metrics doc. However, if you don’t want to dive into these details, consider using the default Net Amortized Cost. Finally, apply any filters you wish, which will only return resources of the selected aggregate that match the filter value.
After configuring your cloud costs, we’ll configure Kubernetes workloads. Think of this cost data as what you should see on your Allocations dashboard normally. Like cloud costs, you can aggregate by and filter to provide a detailed analysis of your spend.
You will now see your cost center at the bottom of the page under the Report Preview. You can create additional cost centers when you select Add cost center, and repeat as needed. When you are finished, select Done to be taken to your final CCR. You will be able to select individual line items to receive cost breakdowns, or adjust the window of your report to sample different ranges of data. Your CCR will also be saved to your Reports page for easy access.
Conclusion
We hope these two new features will allow you and your team to obtain the cost metrics you need in ways that are more accessible, customizable, and intuitive than ever before. For any additional questions, see our documentation on scheduling reports and cost center reports, or contact us at support@kubecost.com with your questions.