Direct Savings with Kubecost Actions
Kubecost is more than a product for monitoring spend ex-post-facto; it’s a proactive tool for reducing your future spend as well. The most recent expansion of Kubecost’s Savings functionality is called Actions, an effective way to provide direct savings to your Kubernetes environment in the form of various right-sizing and turndown tools. The different Actions available allow you to implement instant means of optimizing your workloads to begin saving.
Actions is a menu found underneath Savings in the left navigation, but you may need to enable it first:
Enabling Kubecost Actions
There are two steps you need to perform first to receive full access to Kubecost Actions:
- Enable experimental features
- Enable the Cluster Controller
Experimental features
Kubecost is designing new features to assist with cost monitoring and saving every month. To explore these new features that are in active development, you will need to enable them. In the Settings _page, scroll down to the bottom of the page to find the Enable experimental features toggle. By turning this on, you will see certain beta Kubecost features like Actions. Remember to select _Save to confirm your choice.
Cluster Controller
Next, you need to enable the Cluster Controller. Actions can take savings recommendations and apply them directly to your environment for immediate savings. To do that, you will need to provide write access to your cluster, by installing our Cluster Controller.
Note: Enabling the Cluster Controller, and therefore access to Actions, is only available for GKE, EKS, and AWS Kops clusters.
Once you’ve successfully enabled the Cluster Controller, you should be ready to go.
Creating an Action
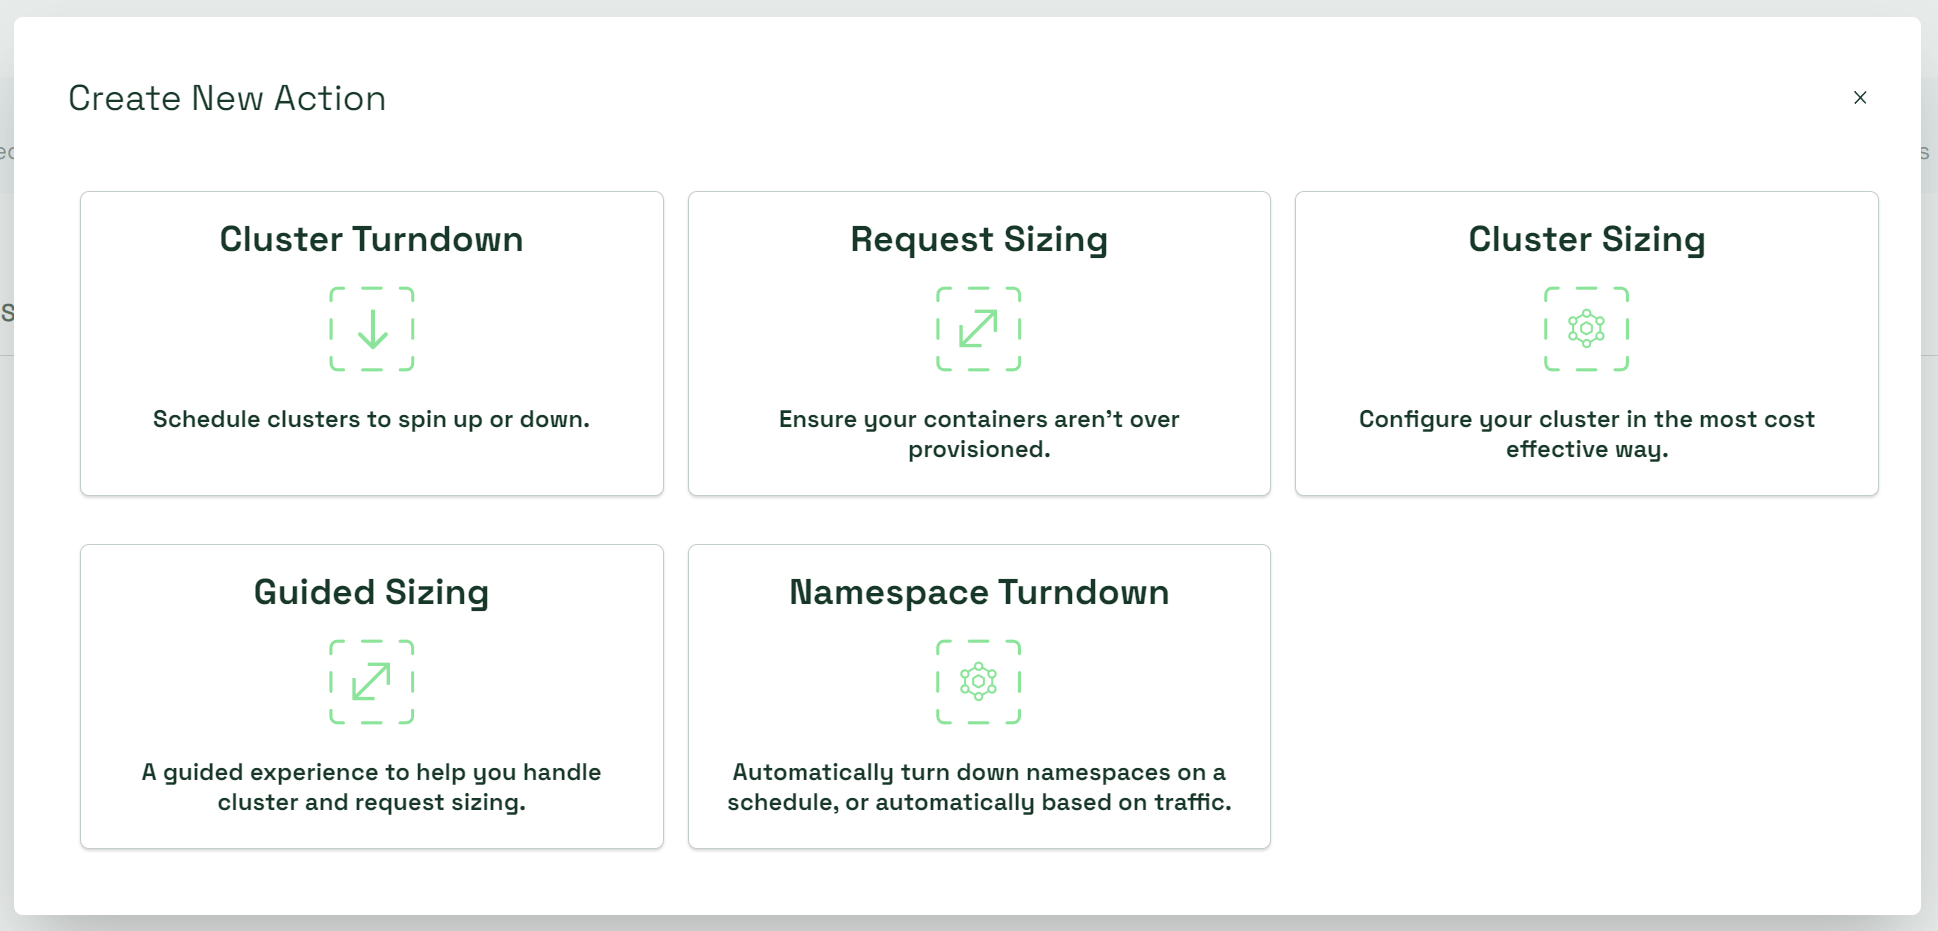
Now you will see Actions in your left navigation. On the Actions page, select Create Action to get started. In the Create New Action window, you’ll see a wide array of different savings tools. We’re going to go through them one by one.
Actions automatically are directed to an individual cluster you have set your context to, and currently only supports primary cluster setups.
Cluster Turndown
Cluster Turndown is a means of maintaining clusters when they are temporarily unneeded, without having to delete them. For example, if you want to keep clusters spun up over nights and weekends without them consuming resources. This is done by “turning down” the cluster, and removing all nodes from the cluster to avoid spending on unused resources.
Request Sizing
Right-sizing is the concept of adjusting your resource requests to only request the resources you need and avoid over-provisioning leading to increased costs. Kubecost has implemented a variety of right-sizing options to save across your deployments. The first of these available in Actions is Request Sizing for containers.
Selecting Request Sizing will take you to Kubecost’s existing container request right-sizing recommendations feature (you can also access this from your Savings page). Here, you can implement a one-time or continuous, autoscaling right-sizing recommendation for containers in your cluster. Selecting Customize will allow you to adjust your workload profile to receive more accurate recommendations.
Cluster Sizing
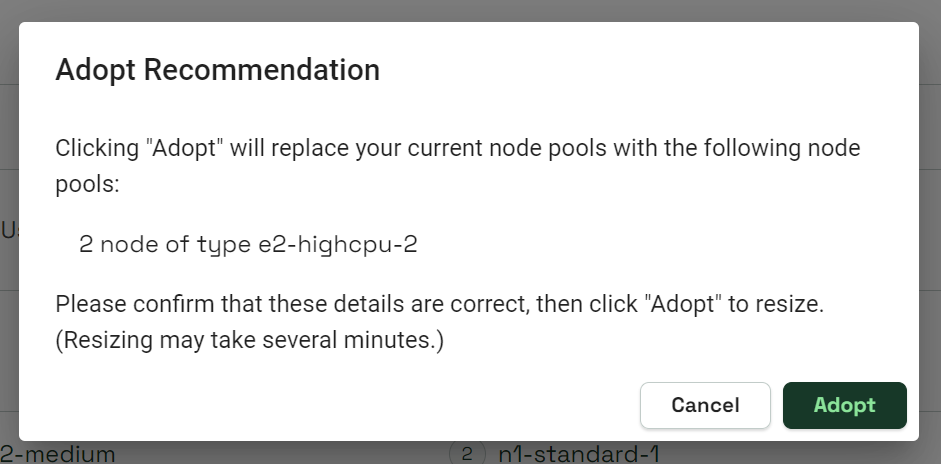
Selecting Cluster Sizing _will take you to Kubecost’s existing cluster sizing recommendations feature. Immediately a pop-up window will appear which will let you instantly adopt a recommendation. If you want to customize your profile or explore the feature, select _Cancel.
Select _Edit _in the top right to view more options to configure your cluster profile before adopting recommendations.
Namespace Turndown
In any long-running environment, you’re bound to accumulate a stack of unused resources. Cleaning these up is now an efficient and simple task. This comes in the form of Kubecost’s new Namespace Turndown.
Creating a new turndown
The process is super simple: on the Actions page, select Create New Action _> _Namespace Turndown to get started.
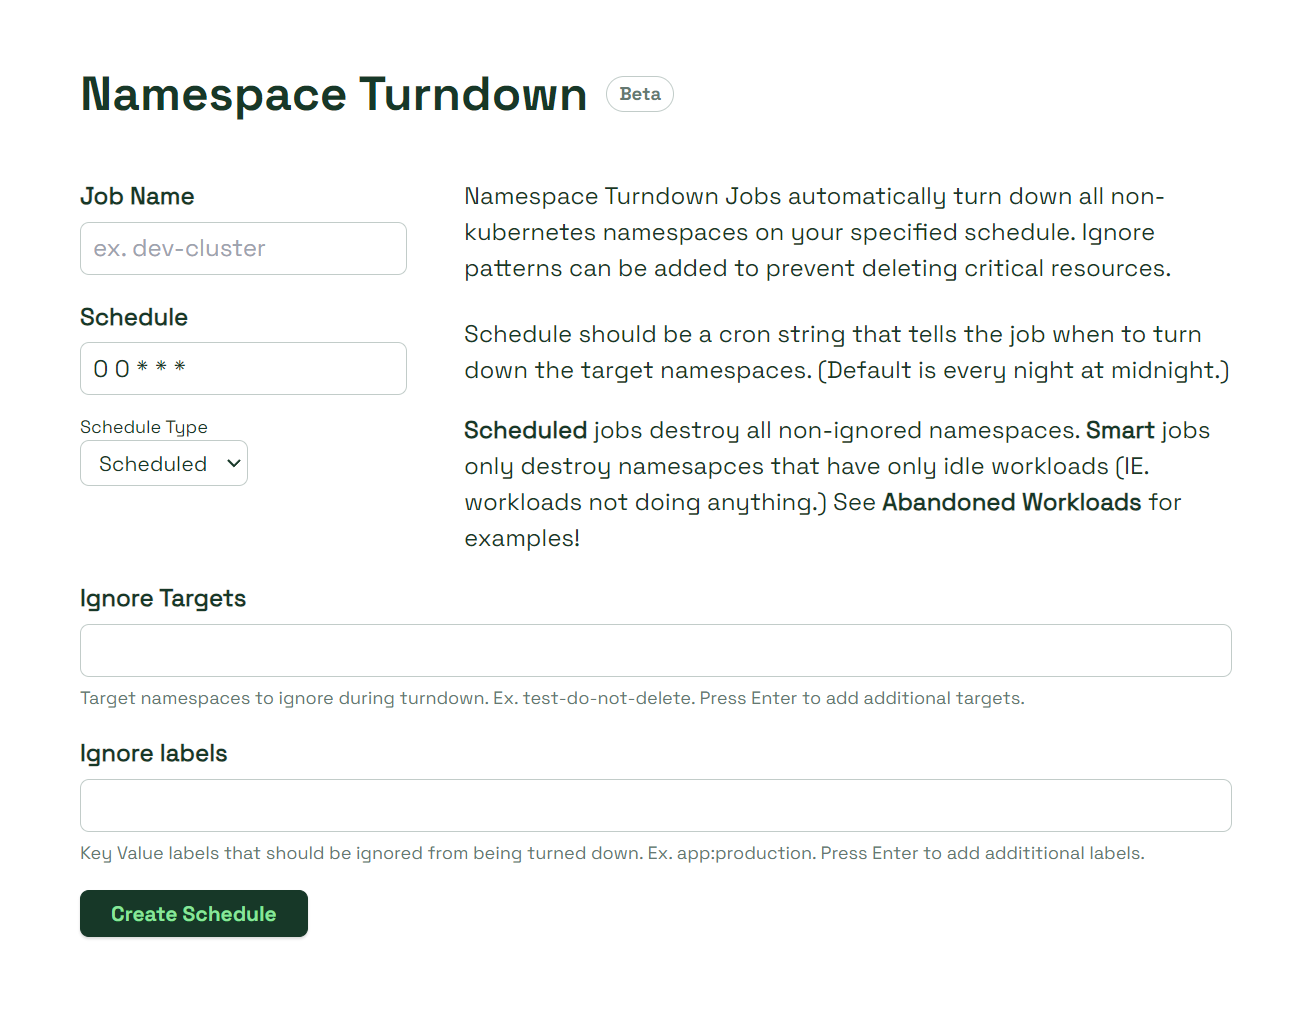
Begin with the name of your turndown action, which should be descriptive enough for you and your team to understand its purpose.
Next, it’s time to create the schedule. This is for when and how often your turndown will occur. The schedule must be formatted in a cron string such as in the example screenshot. The default value, 0 0 * * *, will perform the action every night at midnight.
Now we must decide on the schedule type. Kubecost has two forms of namespace turndown:
- Scheduled turndown: Will delete all namespaces except those marked as Ignore Targets (see below)
- Smart turndown: Will delete only namespaces that are completely idle. This is done using Kubecost’s Idle Detection logic.
Ignore Targets are certain resources you want to manually protect from being deleted using a filter system. This system supports the use of wild card filters, where adding * to the end of the value will check for any and all resources containing that value. For example, if you use kube* as a filter, Kubecost will prevent any namespace featuring kube from being deleted. Namespace Turndown will always ignore namespaces named kube-*, default, and the namespace you installed the Cluster Controller on.
The Ignore labels field allows you to provide key-value pairs of resources you want to save as another means of excluding certain workloads from deletion.
Once you’re done detailing your turndown, select Create Schedule, and you’re done! Kubecost Actions are a direct path to immediate savings.
Guided Sizing
Kubecost’s new guided sizing feature is a streamlined integration of both container request right-sizing and cluster right-sizing, all in one place. You have the option of request right-sizing in a 1-click resolution, or a continuous implementation for both features.
Select _Guided Sizing _from the Create New Action window to get started. This feature is broken up into two halves, Request Sizing followed by Cluster Sizing. You do not need to enable both sizing options to use Guided Sizing.
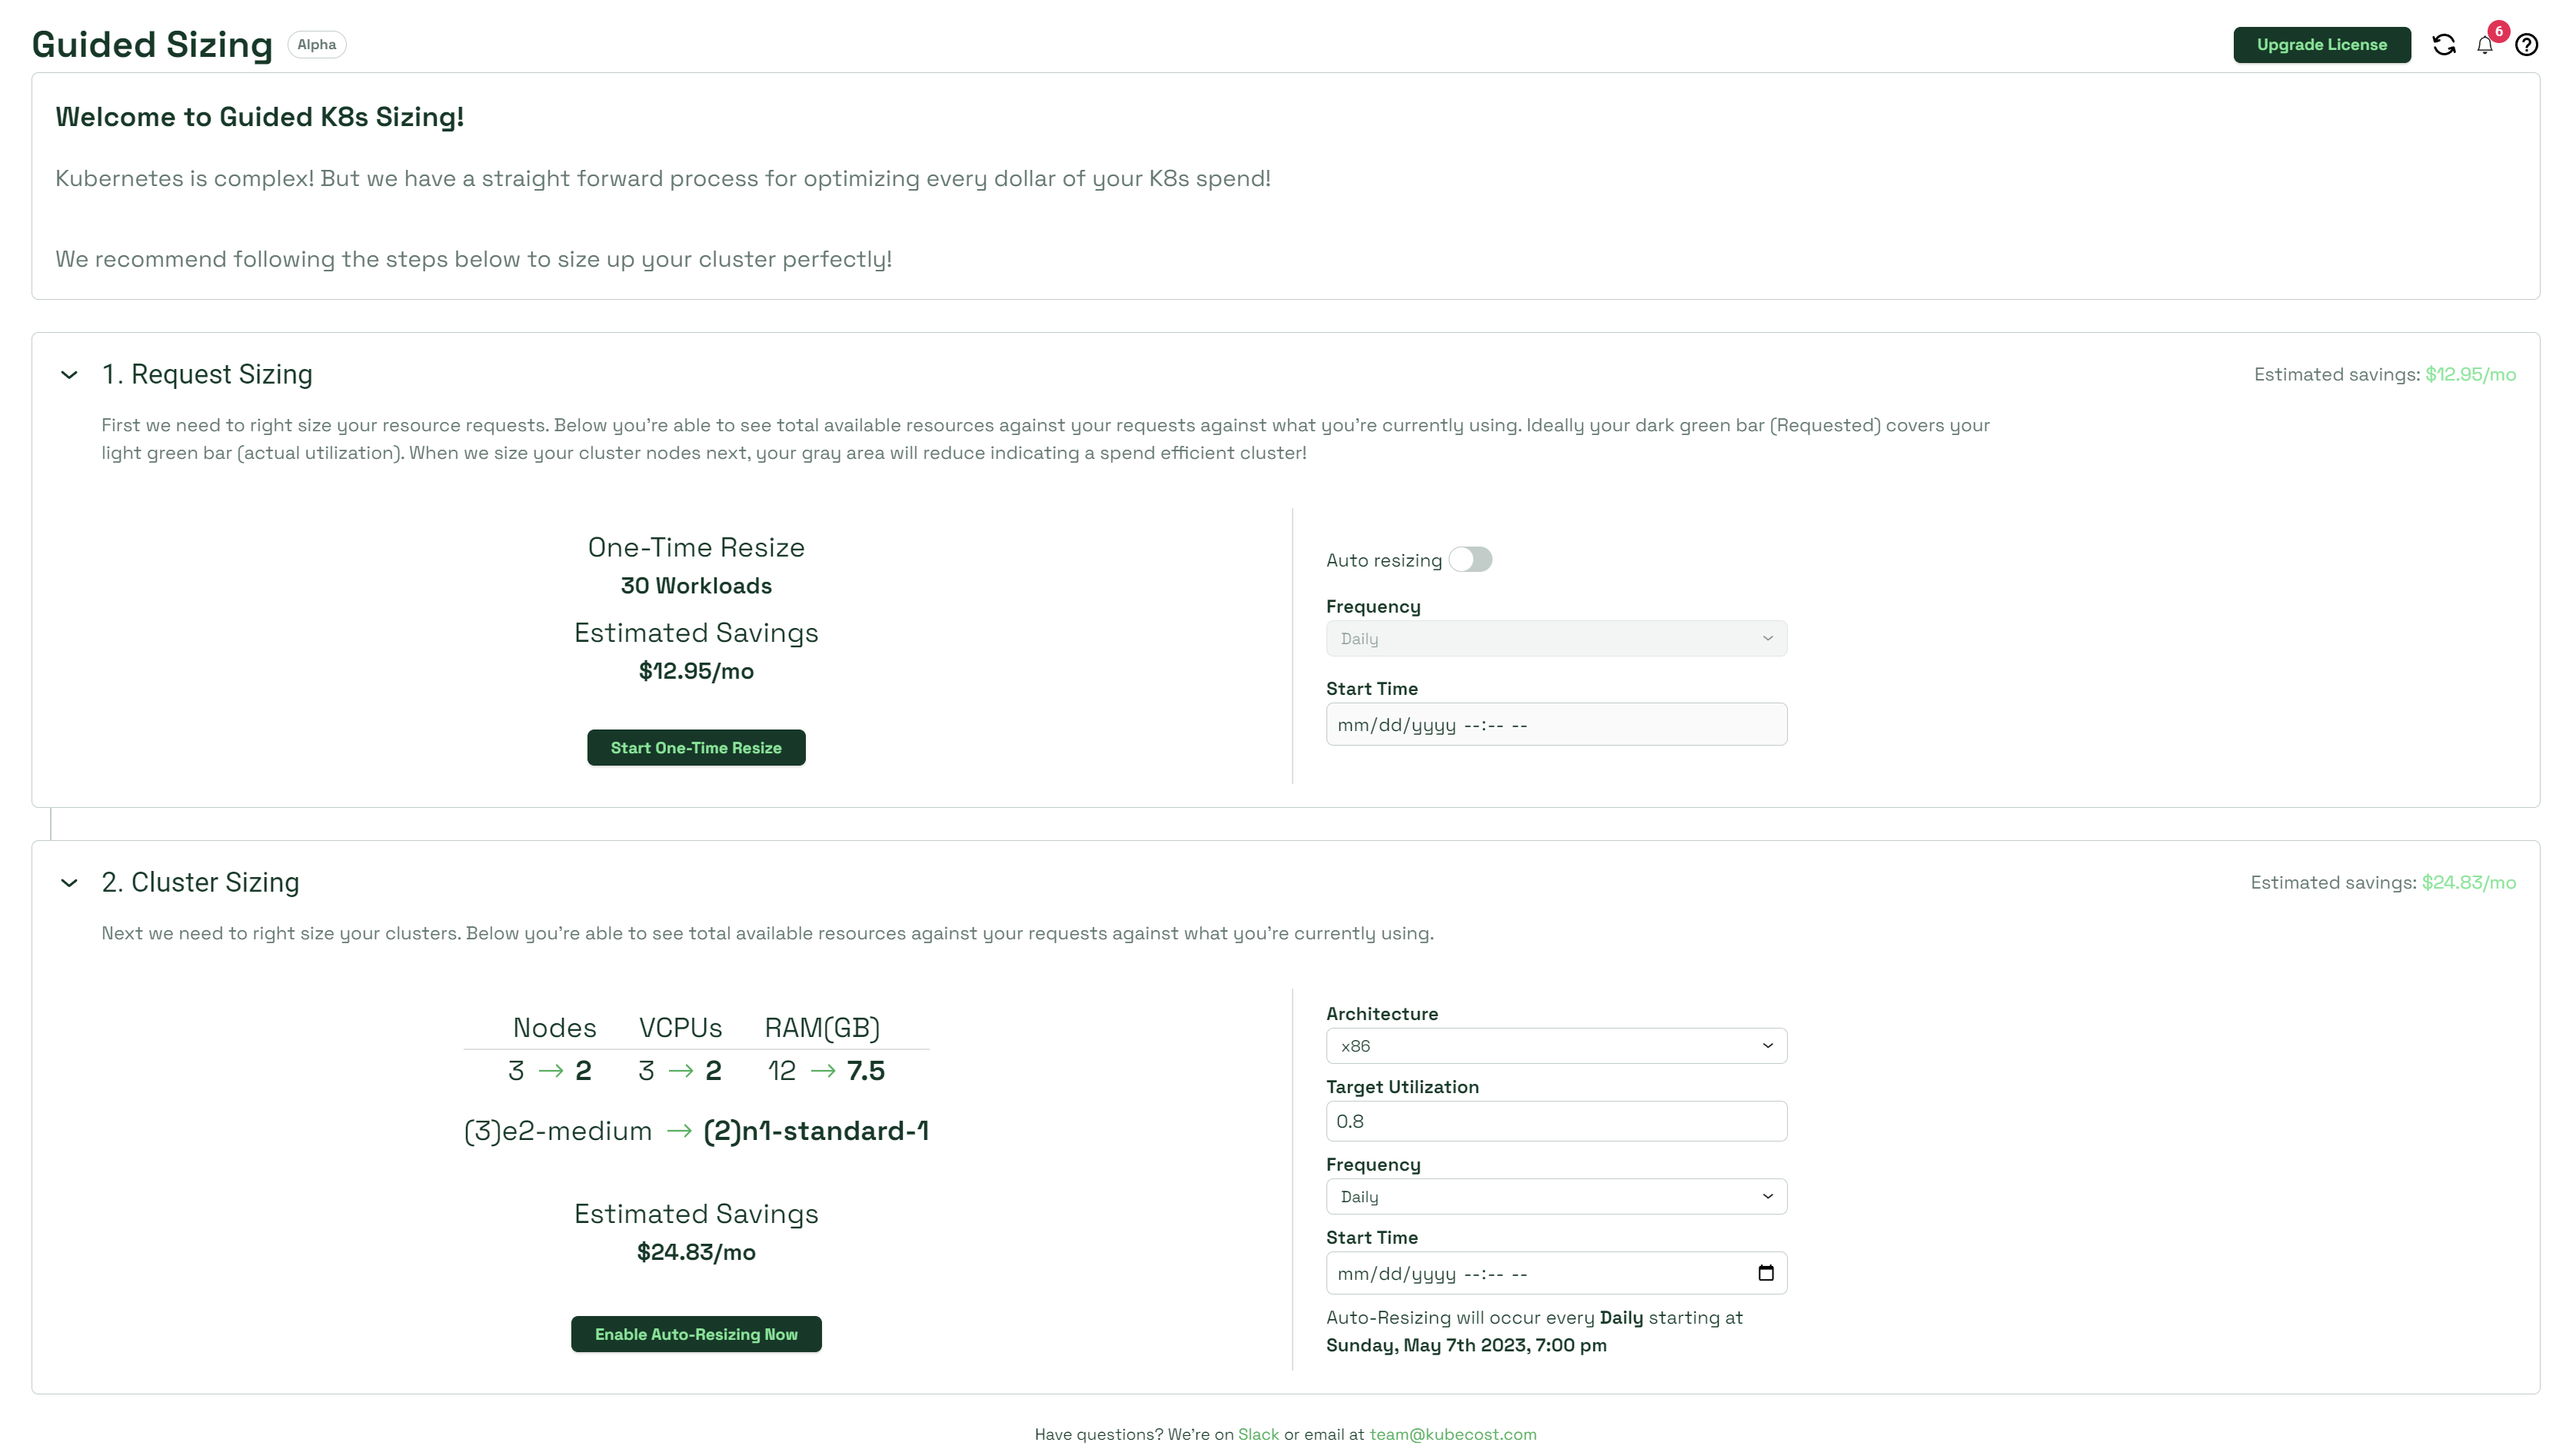
1. Request Sizing
The Request Sizing tab allows for both continuous and one-time resizing of your container requests. To enable continuous sizing, toggle on the Auto resizing switch, then provide the schedule for how frequently you want the sizing to occur. This automation can prevent future headaches from having to keep eyes on your resource requests constantly.
2. Cluster Sizing
The Cluster Sizing tab will allow for only continuous sizing of your cluster nodes (for a one-time adoption, use the Cluster Sizing Action instead of Guided Sizing). You will be able to configure your cluster profile with the Architecture and Target Utilization fields, and configure your sizing schedule with Frequency and Start Time. Then, select Enable Auto-Resizing Now to finalize.
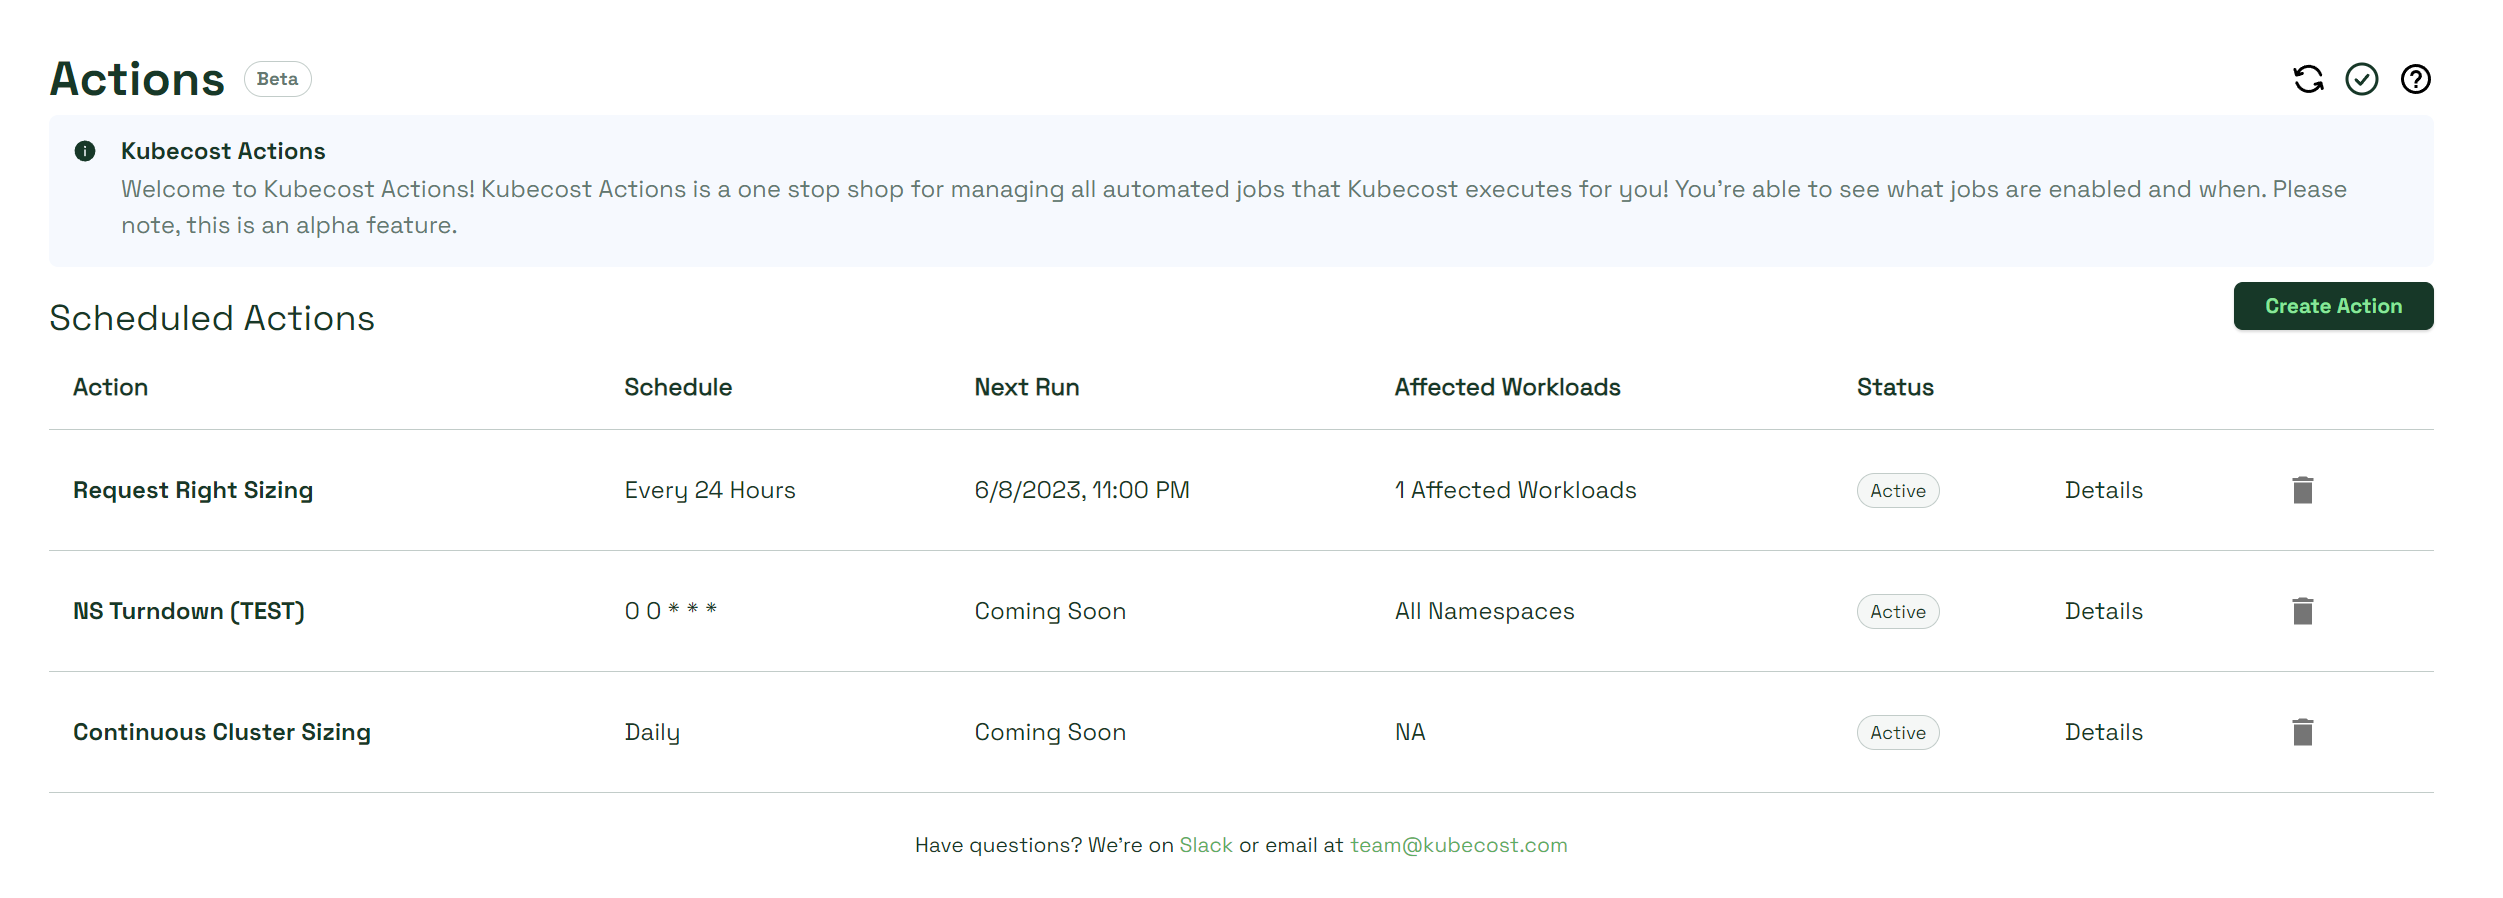
Managing your Actions
Anytime you create a schedule using any Action, it will appear on your Actions page with its frequency, affected workloads, and a status. You can delete a scheduled Action by selecting the trash can icon.
Actions is a budding new feature we hope can develop into a convenient savings scheduling tool. For technical considerations and troubleshooting, see our doc on Actions which includes in-depth explanations for all functionality. If you have any other questions, contact us directly at support@kubecost.com.
Want to learn more about Actions and see it in use? Get a demo.