Install and manage your Kubecost Helm Chart using Lens IDE
We previously wrote about our initial integration with Lens IDE, which provides basic cost visualization in Lens. In this post, we’ll show you how using the Lens IDE makes installing, updating, and troubleshooting your Kubecost Helm release extremely simple—and provide you with step-by-step instructions to set up Kubecost using Lens IDE.
Kubecost + Lens IDE
When working with Kubecost and your Kubernetes cluster as a whole, visibility is key. Being able to quickly see how different objects are interacting with each other is critical to optimizing your cluster. Although the command line is all-powerful, sometimes k8s developers want to interact with a simple graphical interface—that’s where Lens, the Kubernetes Integrated Development Environment (IDE) by Mirantis, comes in.
Kubecost users can connect their clusters to Lens, allowing for simple multi-cluster administration. Each cluster “workspace” has its own built-in terminal set to the corresponding kubeconfig entry, making it quick and easy to use the command line and the correct kubeconfig settings. This can be especially useful for organizations using Kubecost Enterprise with multiple federated clusters.
Install and manage Kubecost via Helm Chart using Lens IDE
One of the benefits of Kubecost is our easy to manage Helm chart. Lens makes installing, updating, and troubleshooting your Kubecost Helm release extremely simple.
Simplify Kubecost pod logs and shells
Using Lens, users can verify all Kubecost-related pods are running and see any errors easily using the cluster dashboard and specifying your Kubecost namespace. This is helpful when deploying Durable Storage or troubleshooting a custom integration or settings change. Lens also allows Kubecost users to get to the cost model container logs and container shell with a few clicks.
Port-Forward without the CLI
Lens allows for simple and secure access to Kubecost services via port forwarding. For those who do not want to expose Kubecost via Ingress or Load Balancer, Lens makes accessing via Service Port Forwarding very easy. Team members with access to the cluster through Lens can access Kubecost securely through the “Services” section.
Follow the guide below to set up your Kubecost Helm release using Lens:
Step 0: Generate a kubeconfig entry for your cluster.
Prerequisite: You will need to have active kubeconfig entry for a kubernetes cluster. In this example, we use Google Kubernetes Engine, but most k8s clusters can be added with this same method.
Generate a config file on your local machine for your cluster. To do this for your GKE cluster, you can click “Connect” on the top of the console. Copy the command-line access command onto your clipboard.
Paste the command into your terminal on your local machine. You will need to have Google Cloud CLI installed on your machine and configured to your project.
Step 1: Download the latest version of Lens IDE
Download Lens, the Kubernetes IDE by Mirantis and install in on your local machine.
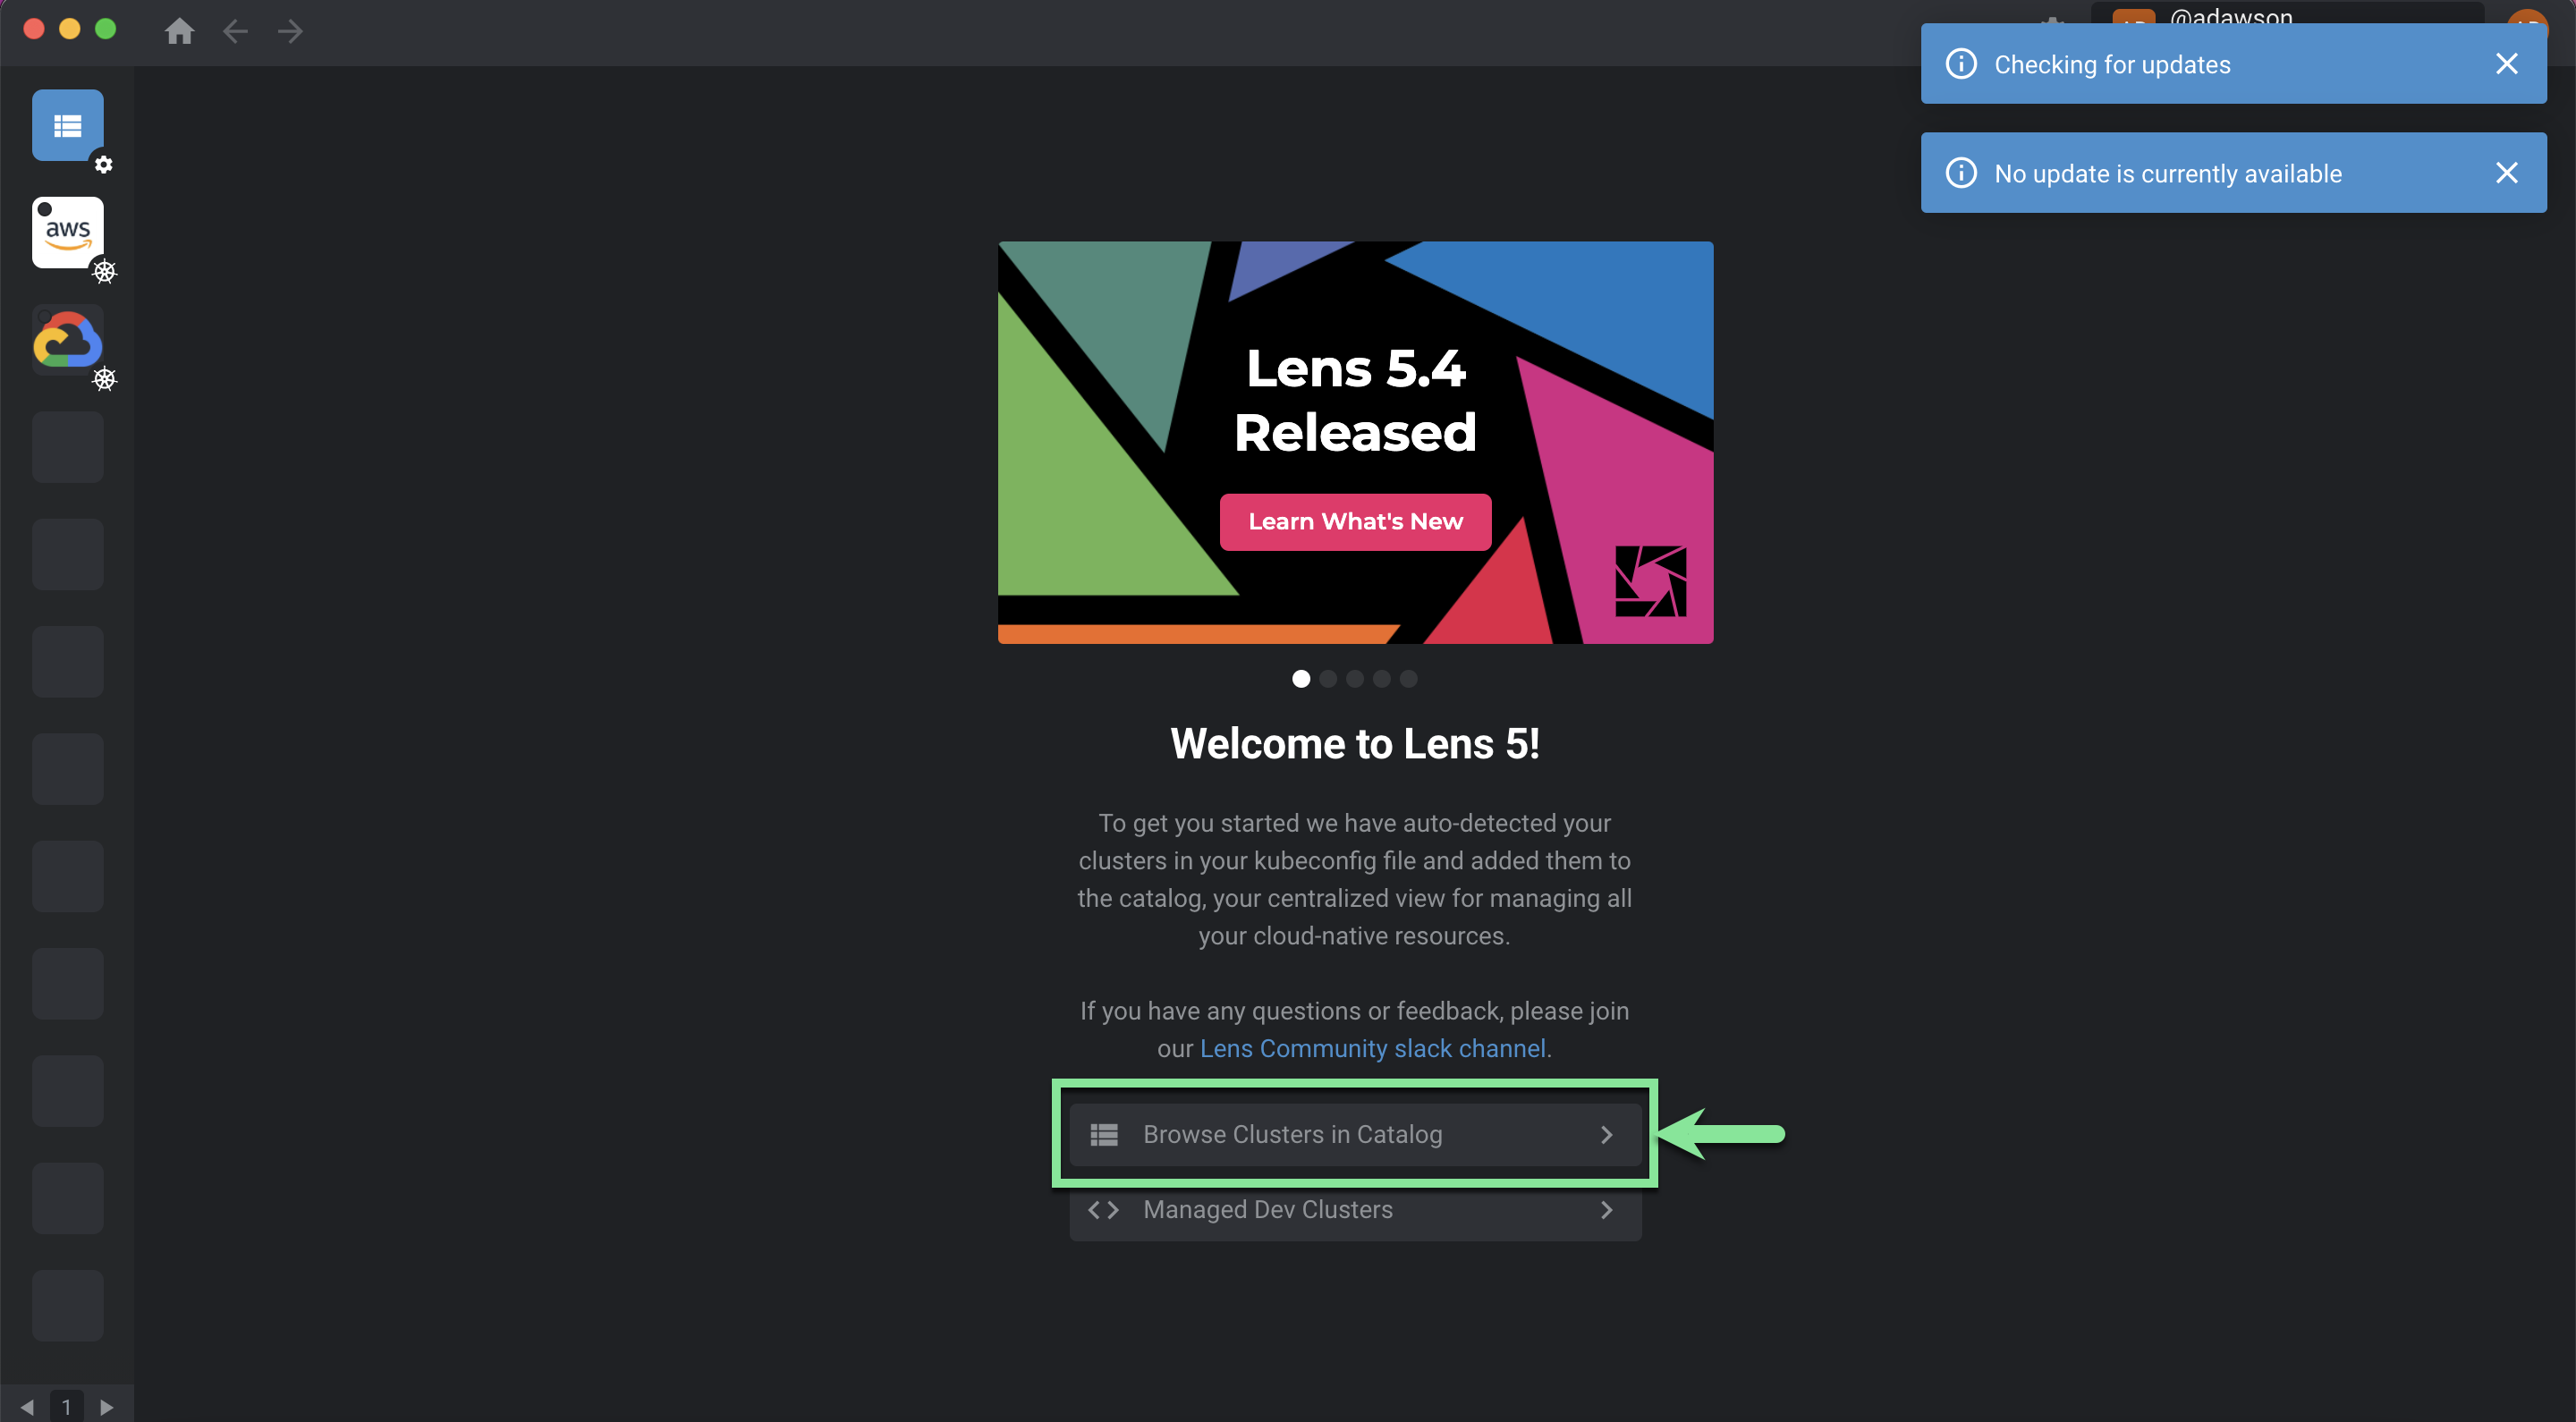
Step 2: Add your cluster to Lens
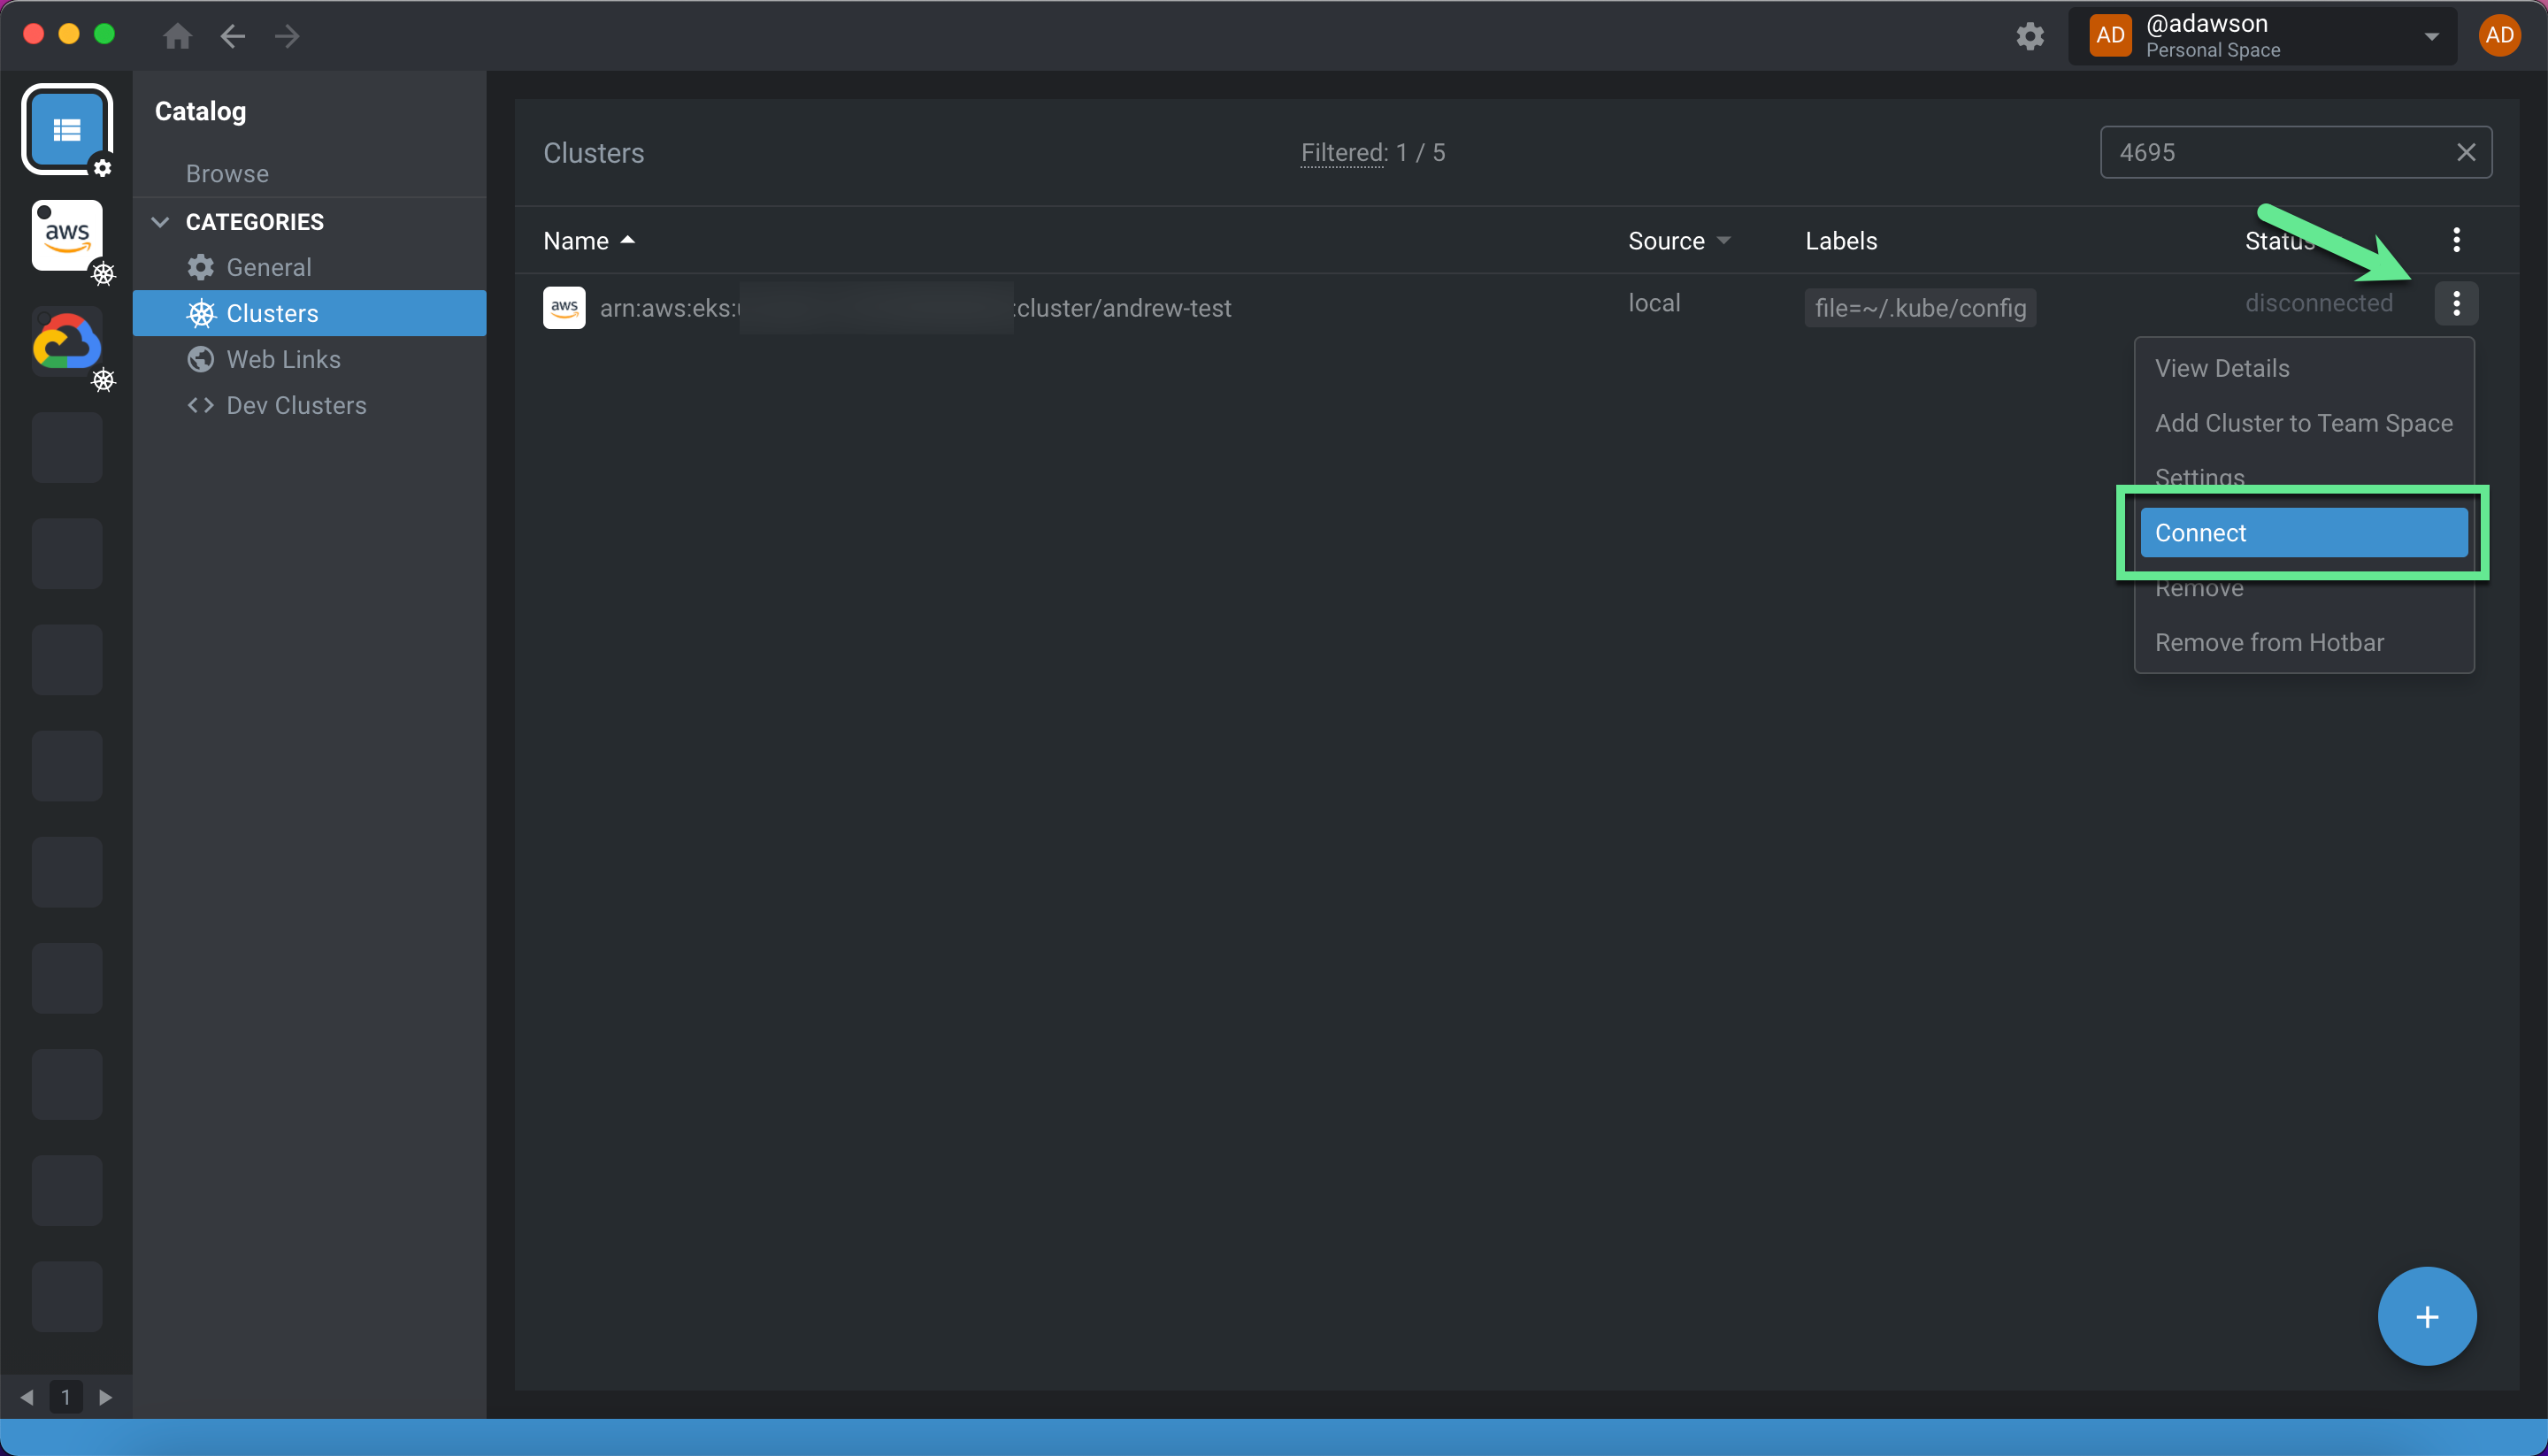
Open Lens on your local machine and click on “Browse Clusters in Catalog.”
You will see your cluster in the list, but it will be marked “disconnected”. Click “Connect” on the cluster, and Lens will start the connection process.
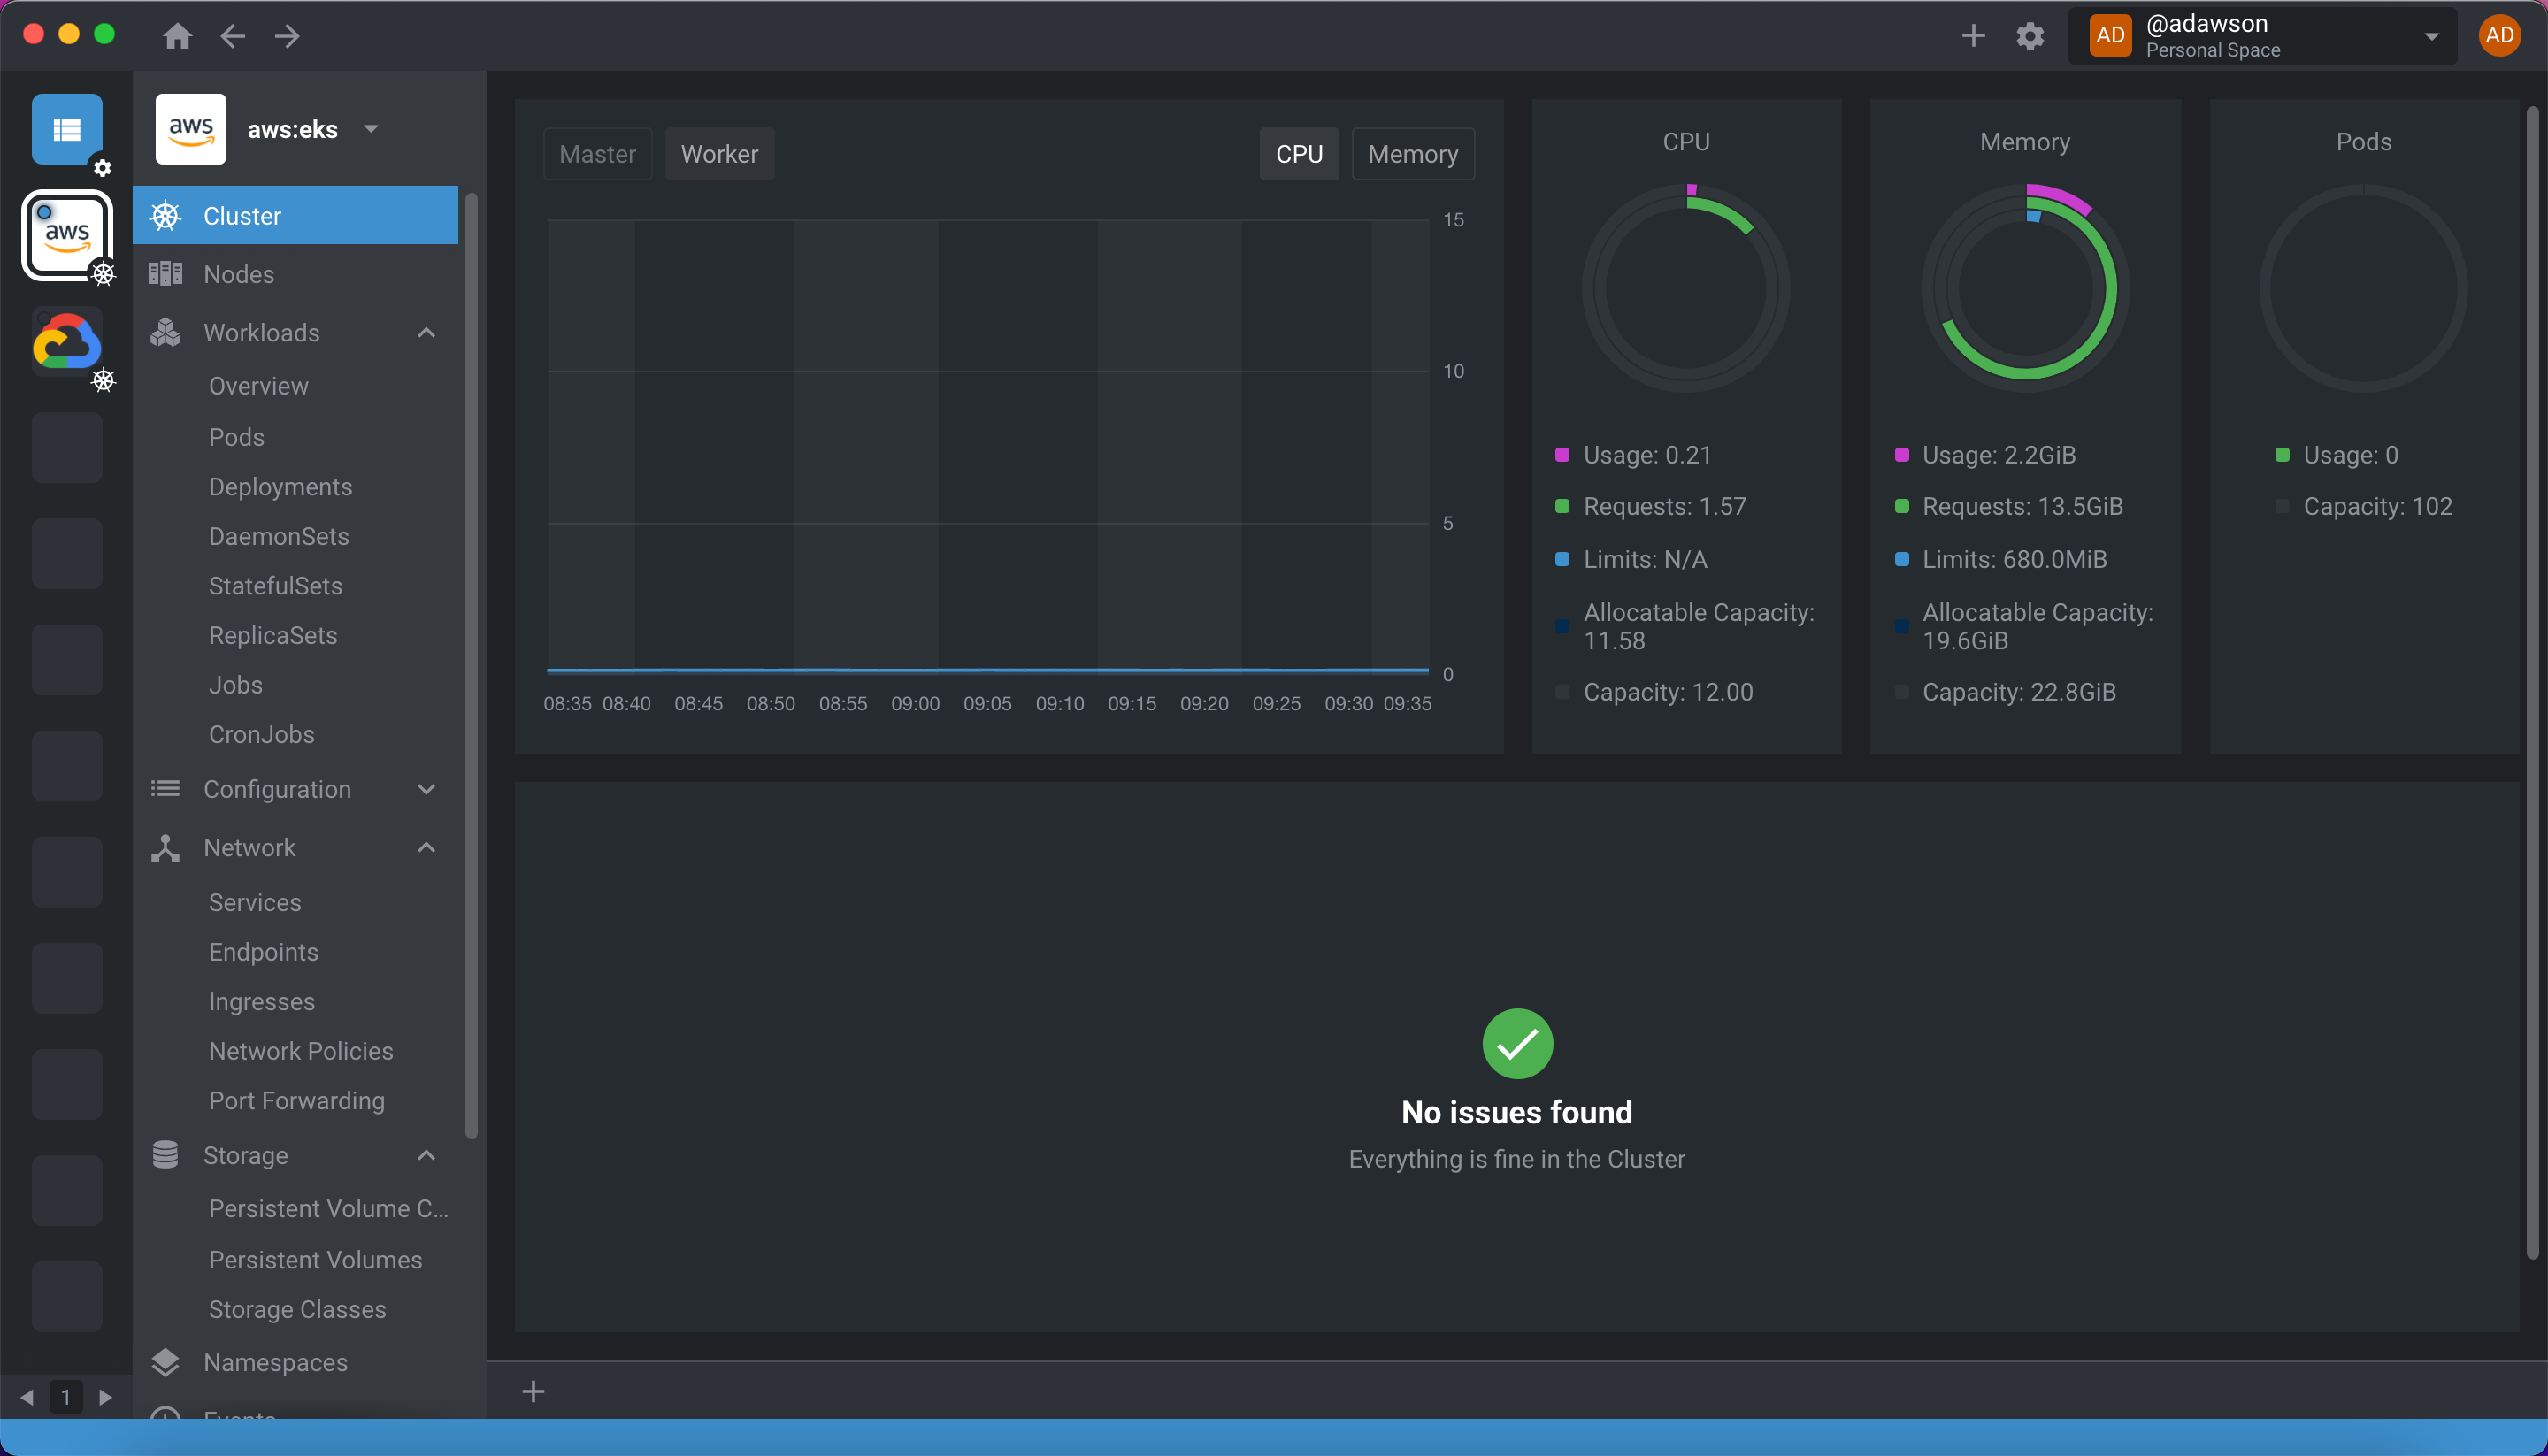
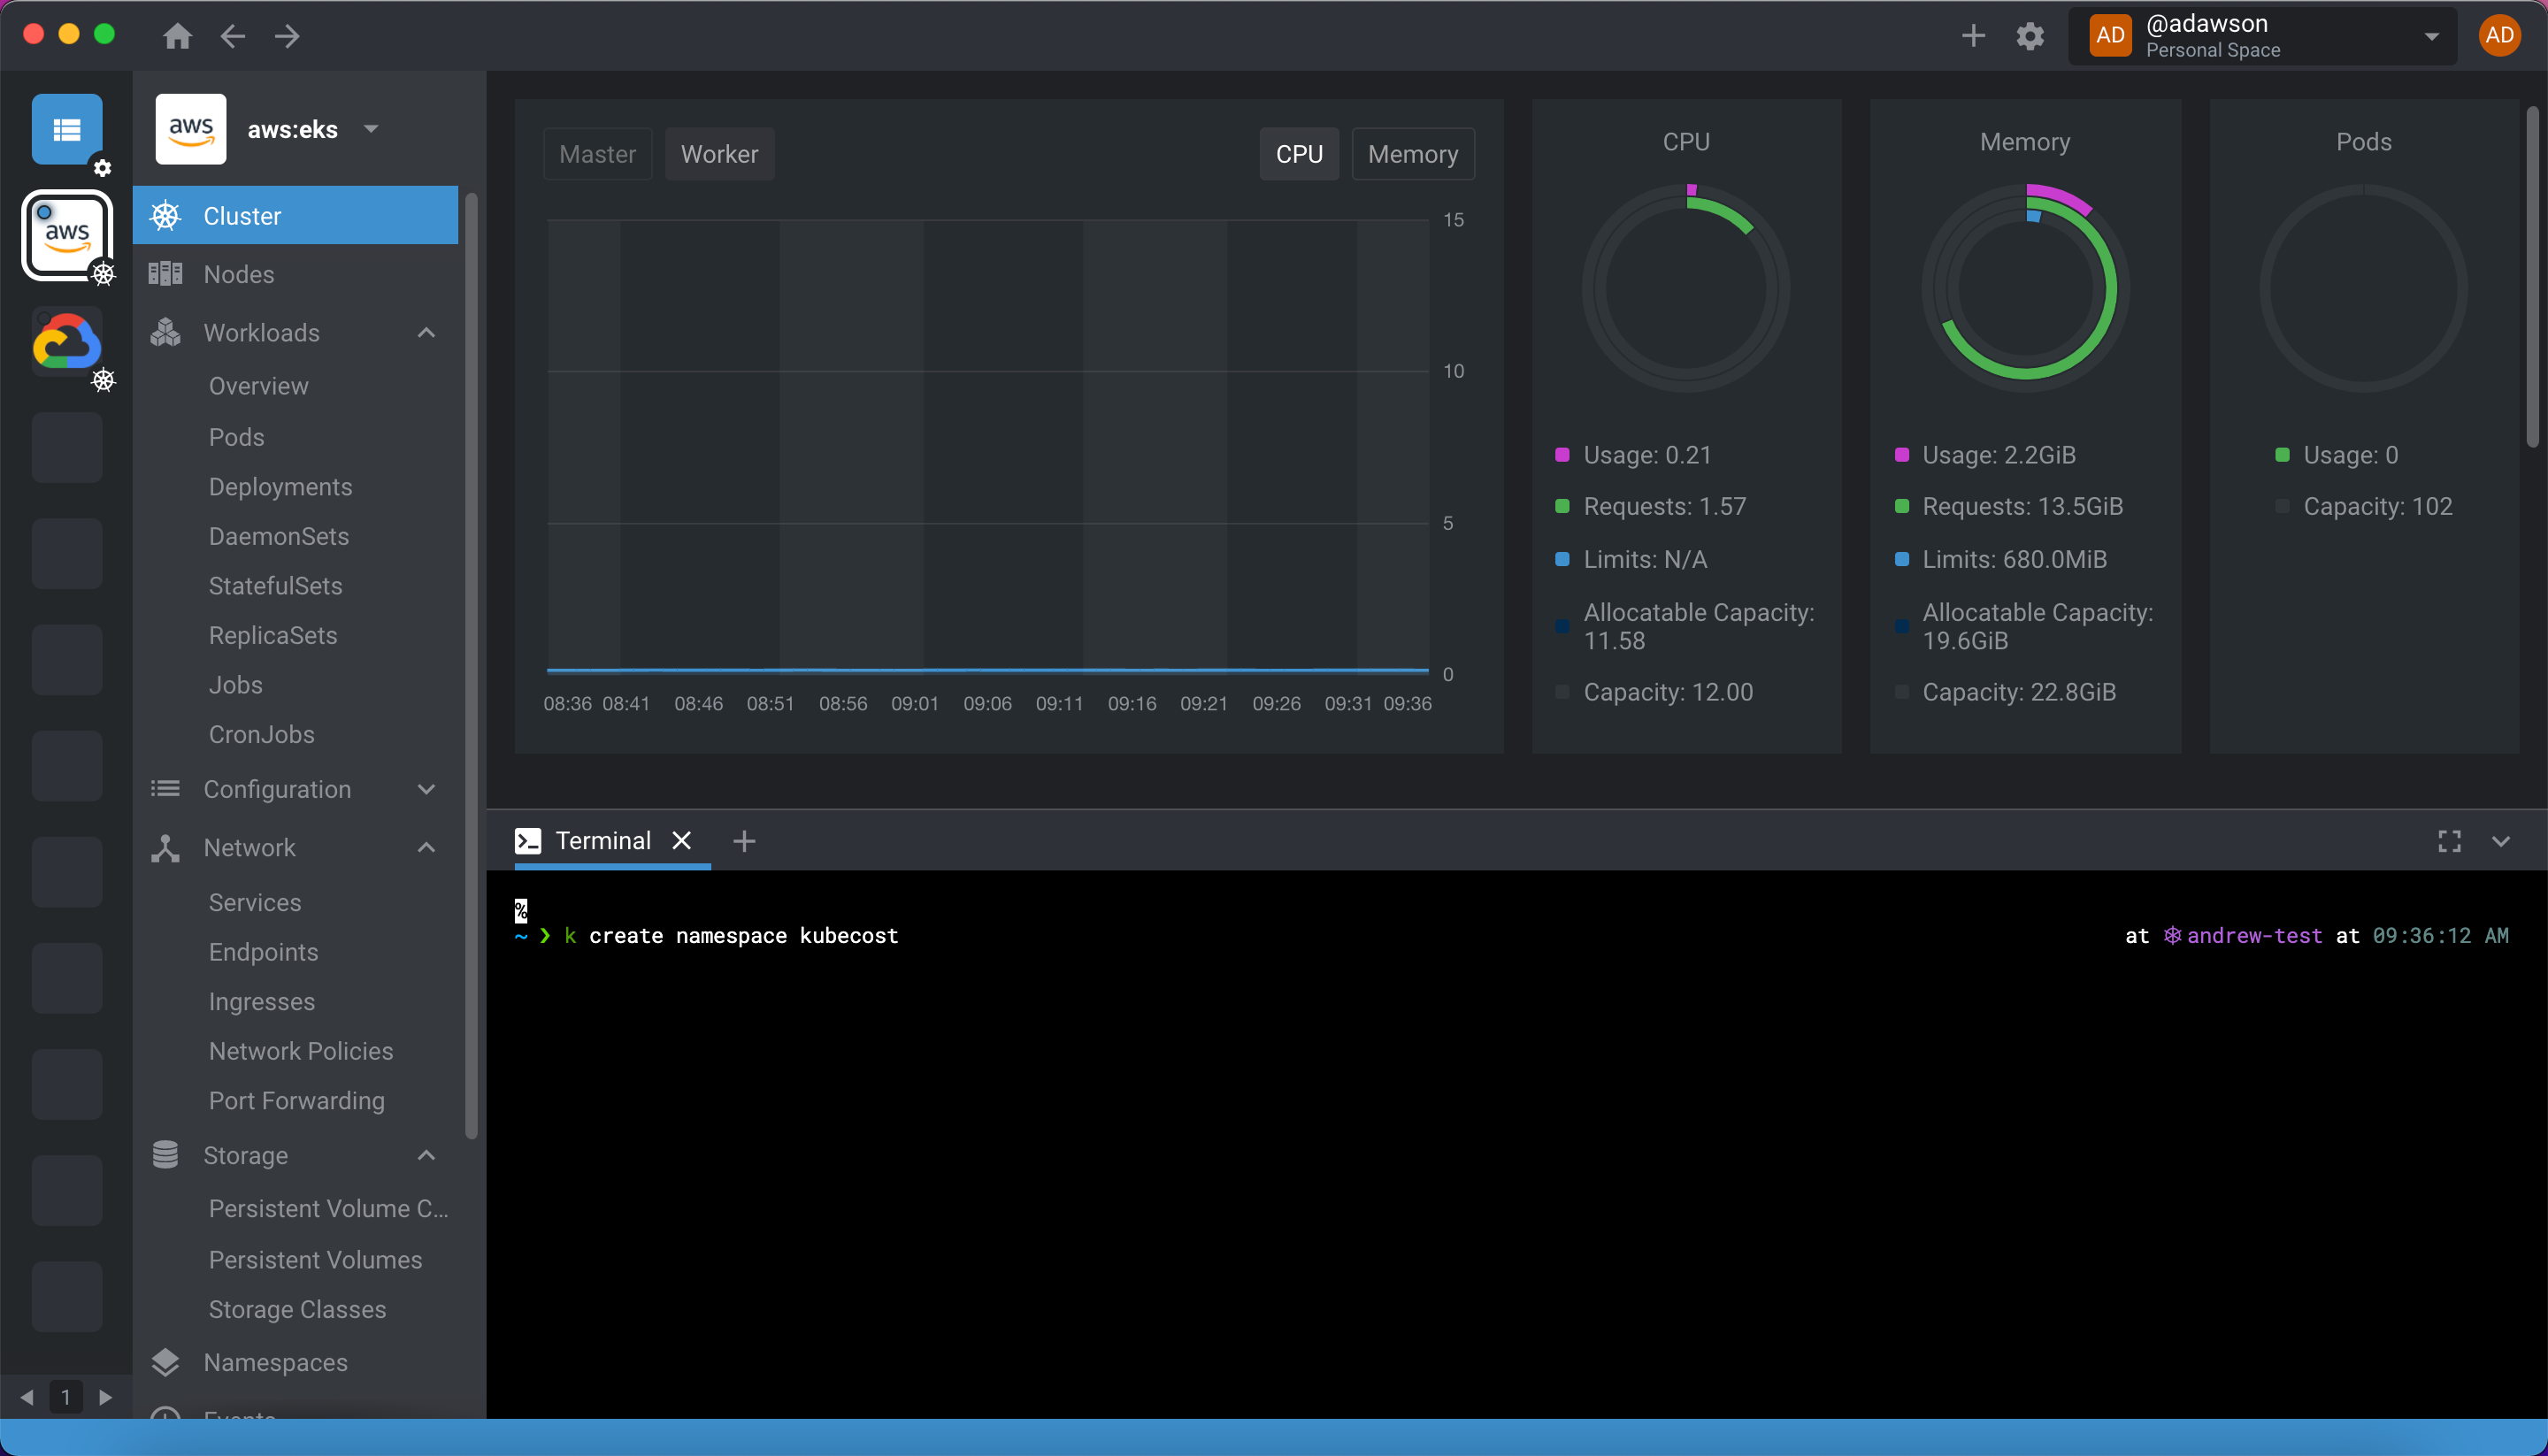
Once connected, you’ll have a full graphical view of your K8s objects, as well as a built-in terminal connected to that cluster.
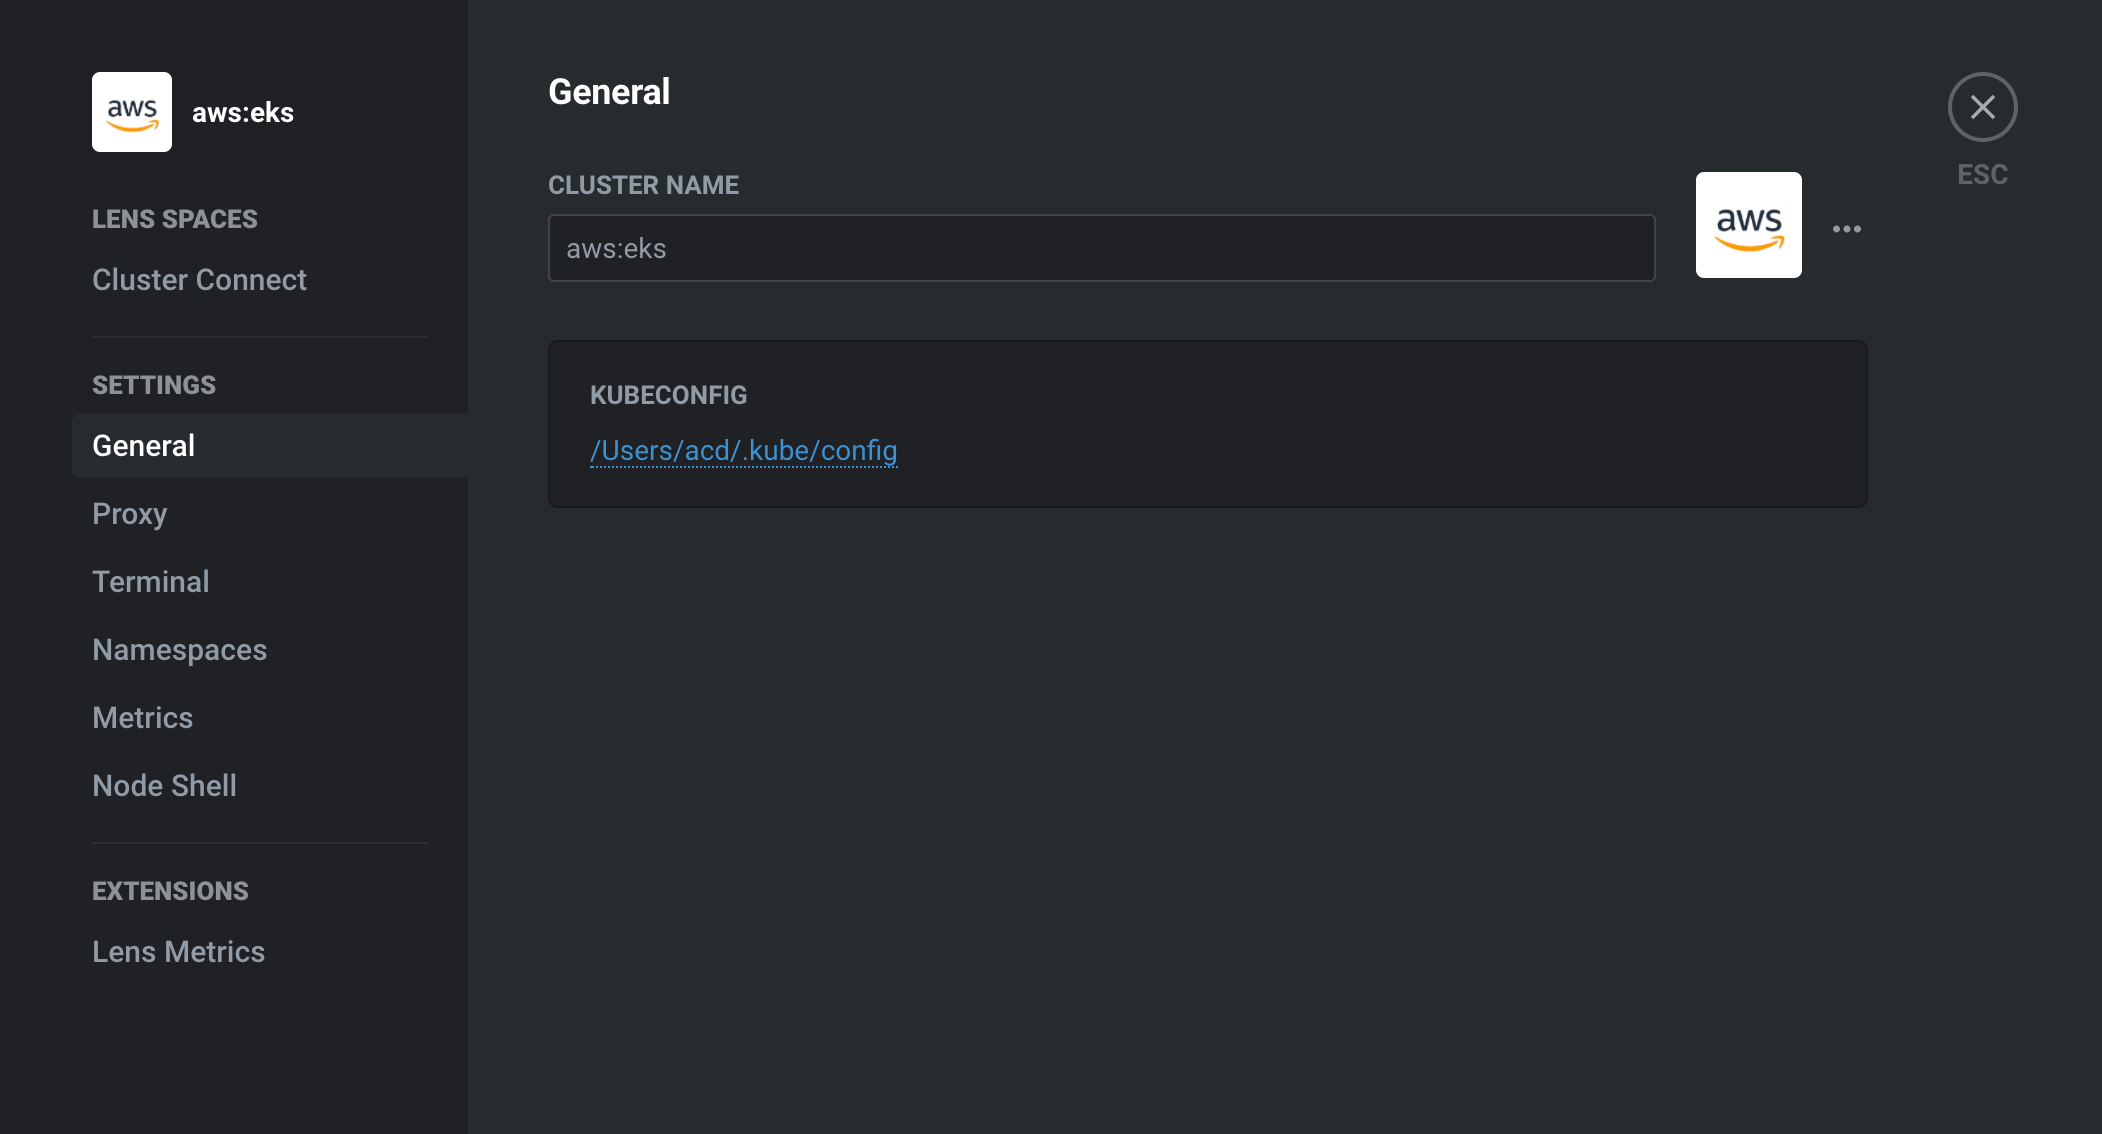
Step 3: Give your cluster a friendly name and other optional settings
Go to the top left corner and drop down the menu, then click “Settings”. Within the settings, you can change the cluster display name, upload an icon, and adjust other settings such as for the cluster.
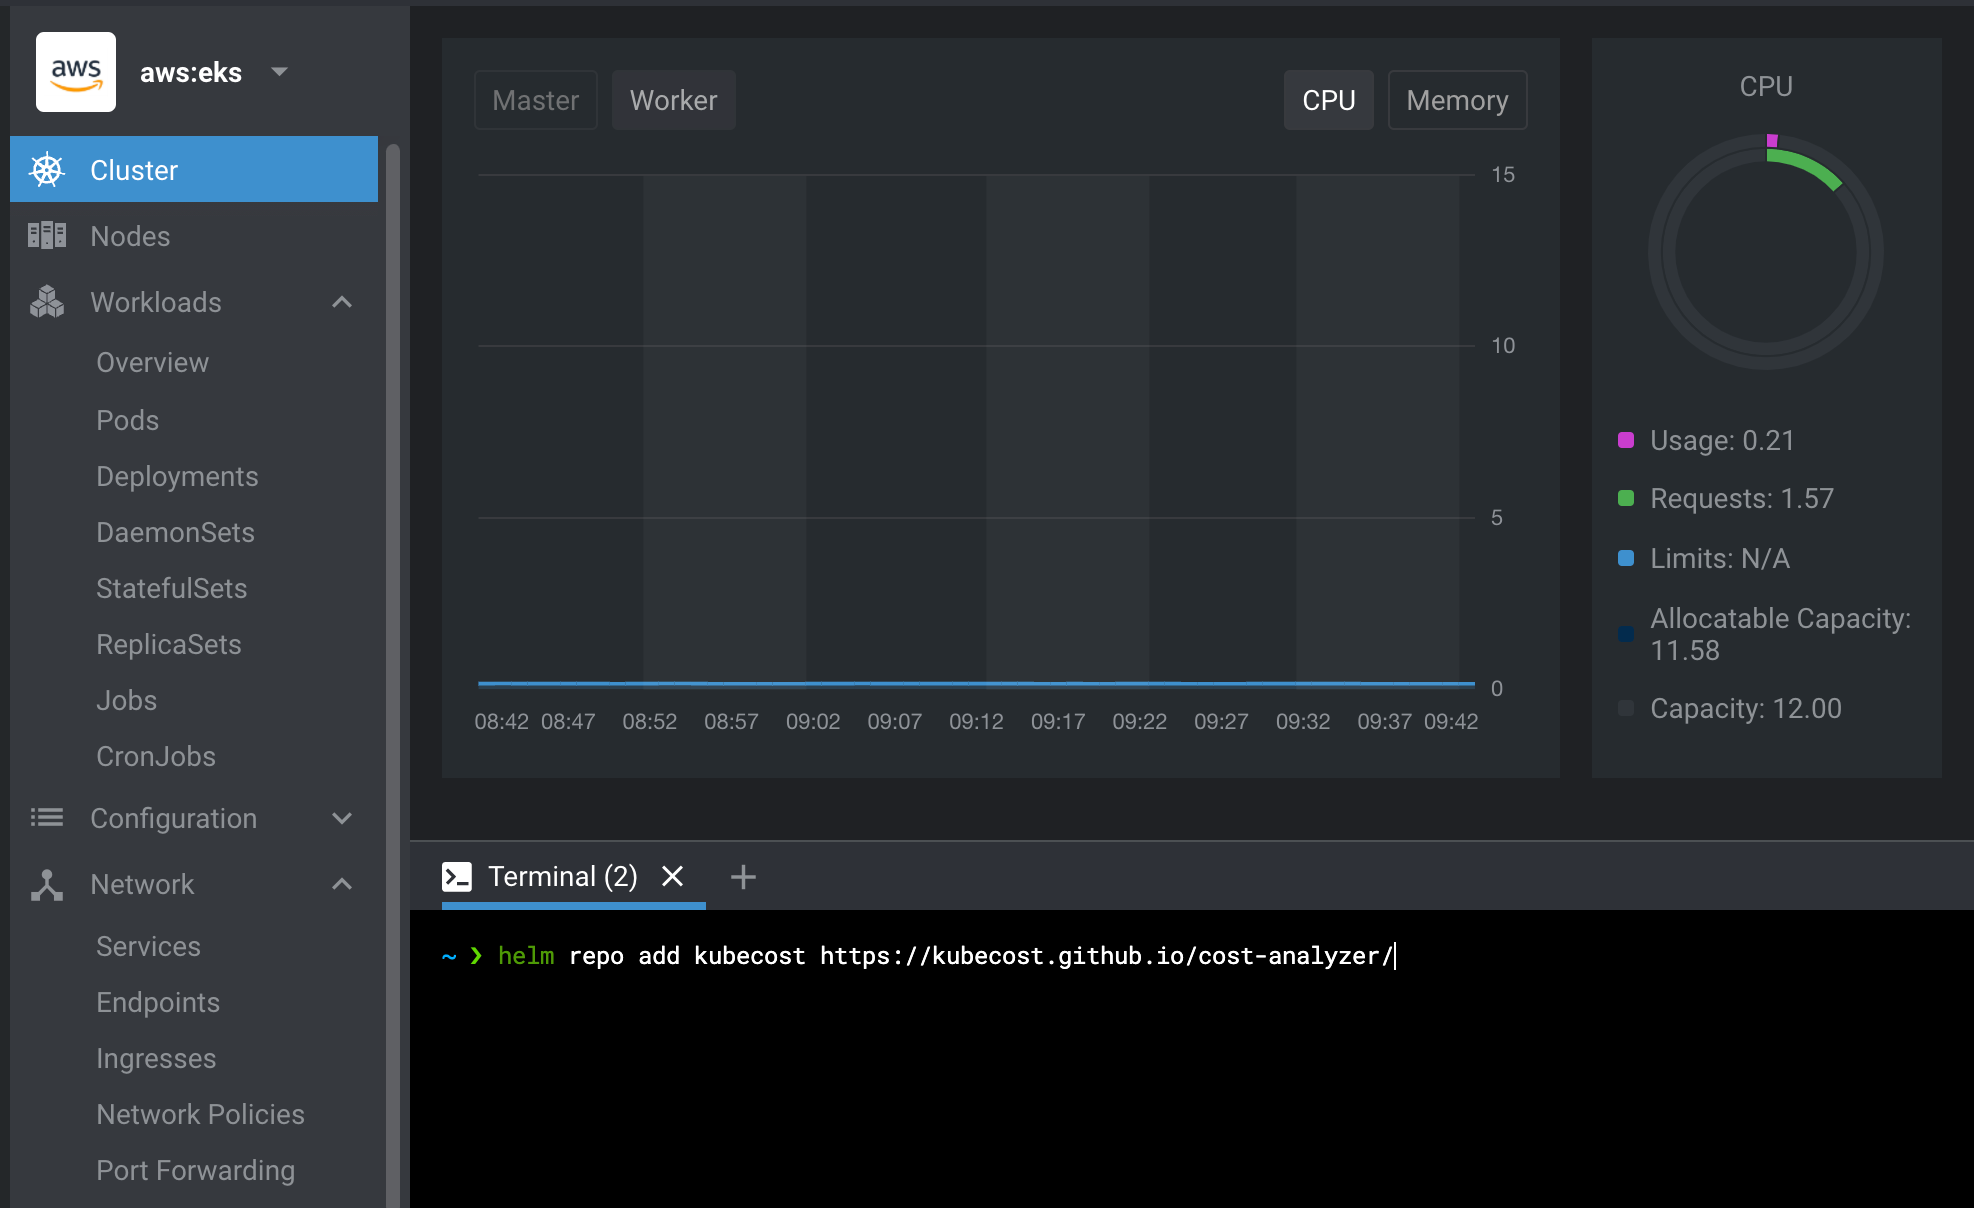
Step 4: Prep your cluster for Kubecost installation
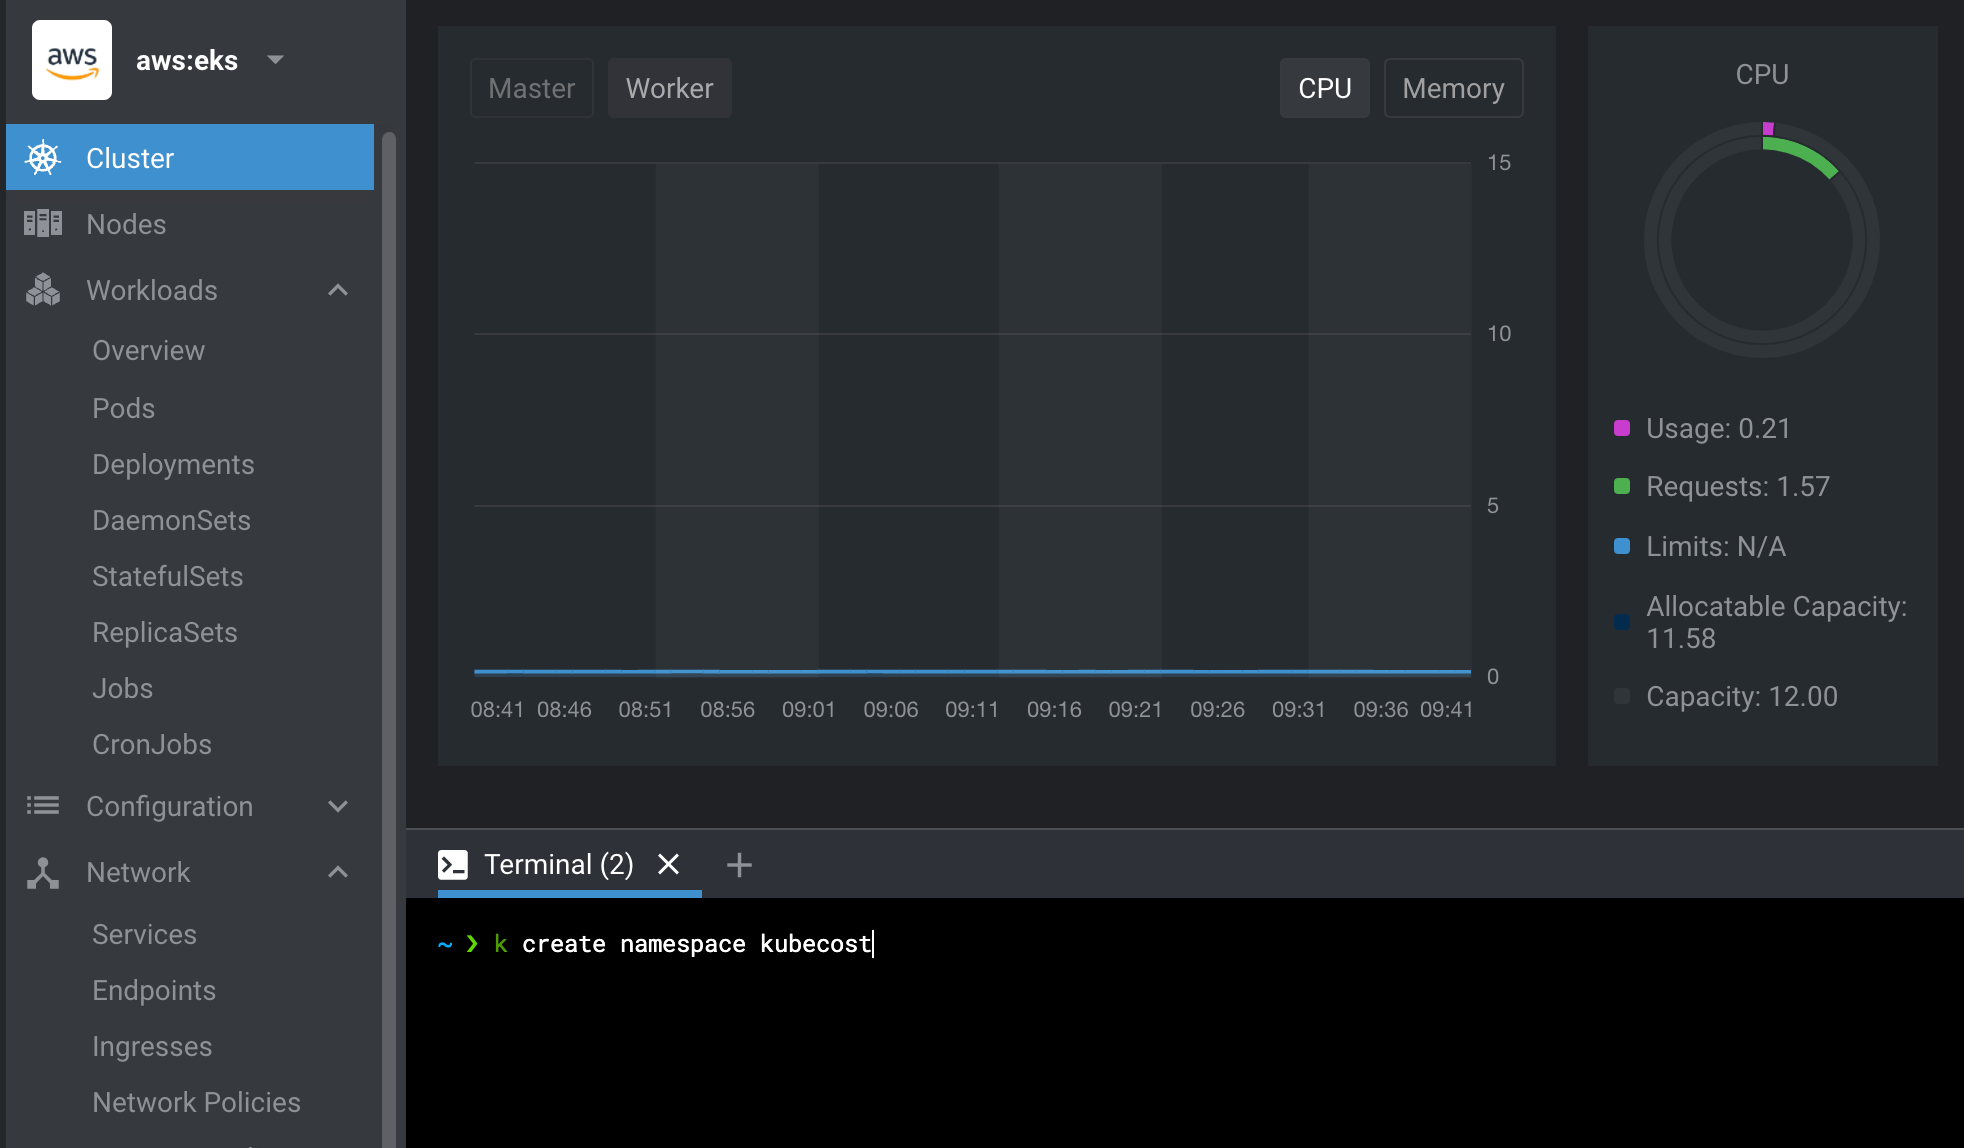
Now that the cluster is set up in Lens, open the in-product terminal. Create the namespace for your new Kubecost installation with the command kubectl create namespace kubecost.
Once the namespace is created, add the Helm repo for Kubecost with the command helm repo add kubecost https://kubecost.github.io/cost-analyzer/
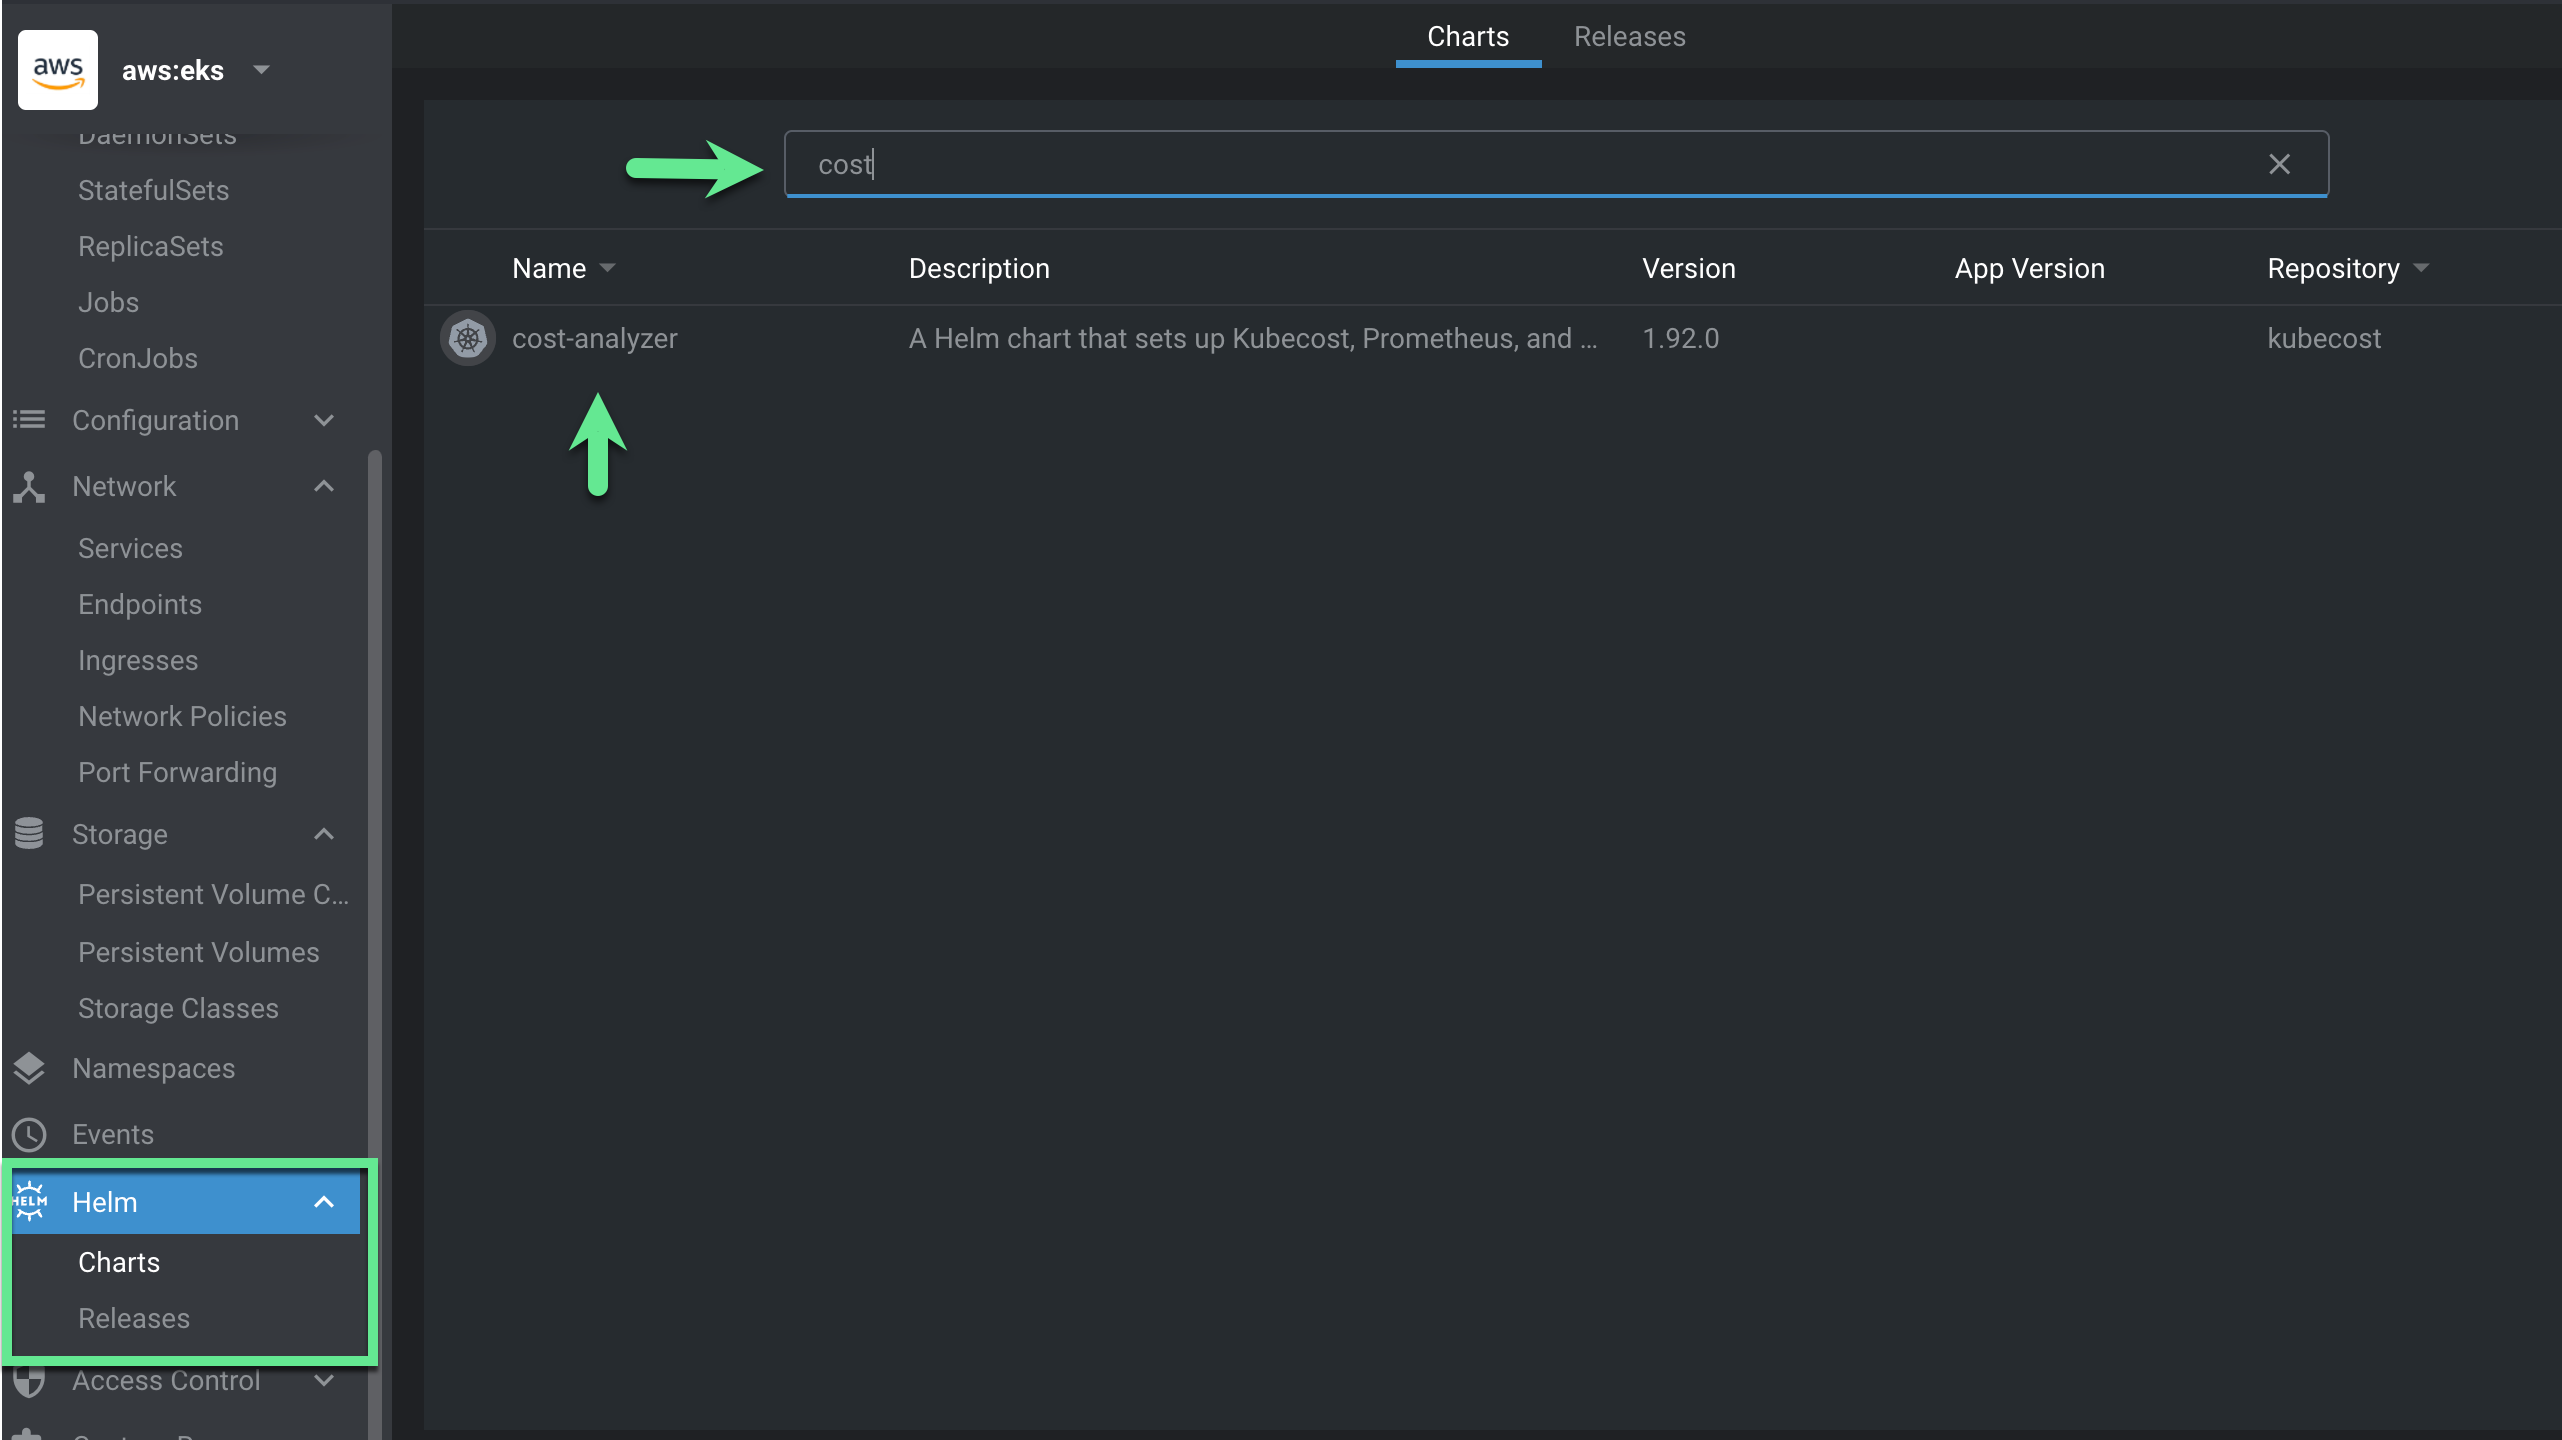
Step 5: Install the Kubecost Helm release using the Lens console
On the left side of the Lens menu, navigate to to “Helm”, then click “Charts”. Search for “cost” in the search bar. You will see the Helm Chart for the Kubecost cost-analyzer that was added in the previous step.
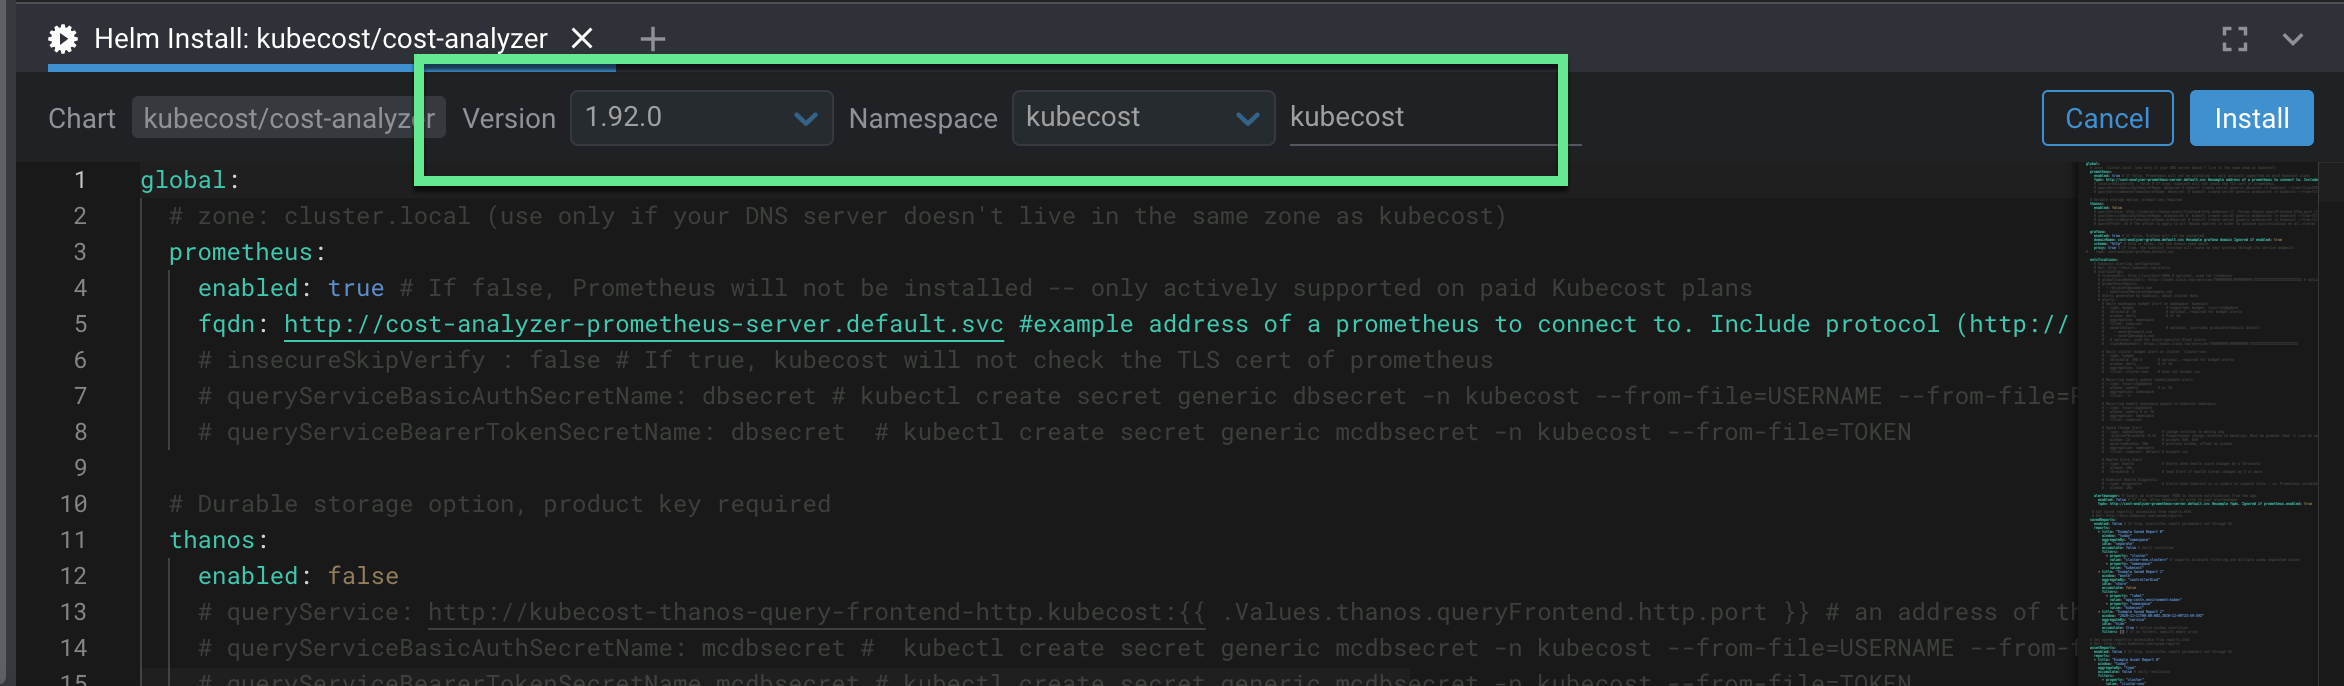
Click the chart and the side information panel will pop up. You can pick the version of Kubecost you want to install, as well as view common Kubecost Helm values

After clicking “Install”, you are given the option to modify different options before deploying. Select the “Kubecost” namespace we created in Step 4, and give the release a friendly name like “kubecost”. The Helm values are shown in the terminal window and can be edited before deployment.
Click the “Install” button and your Helm Chart will install.
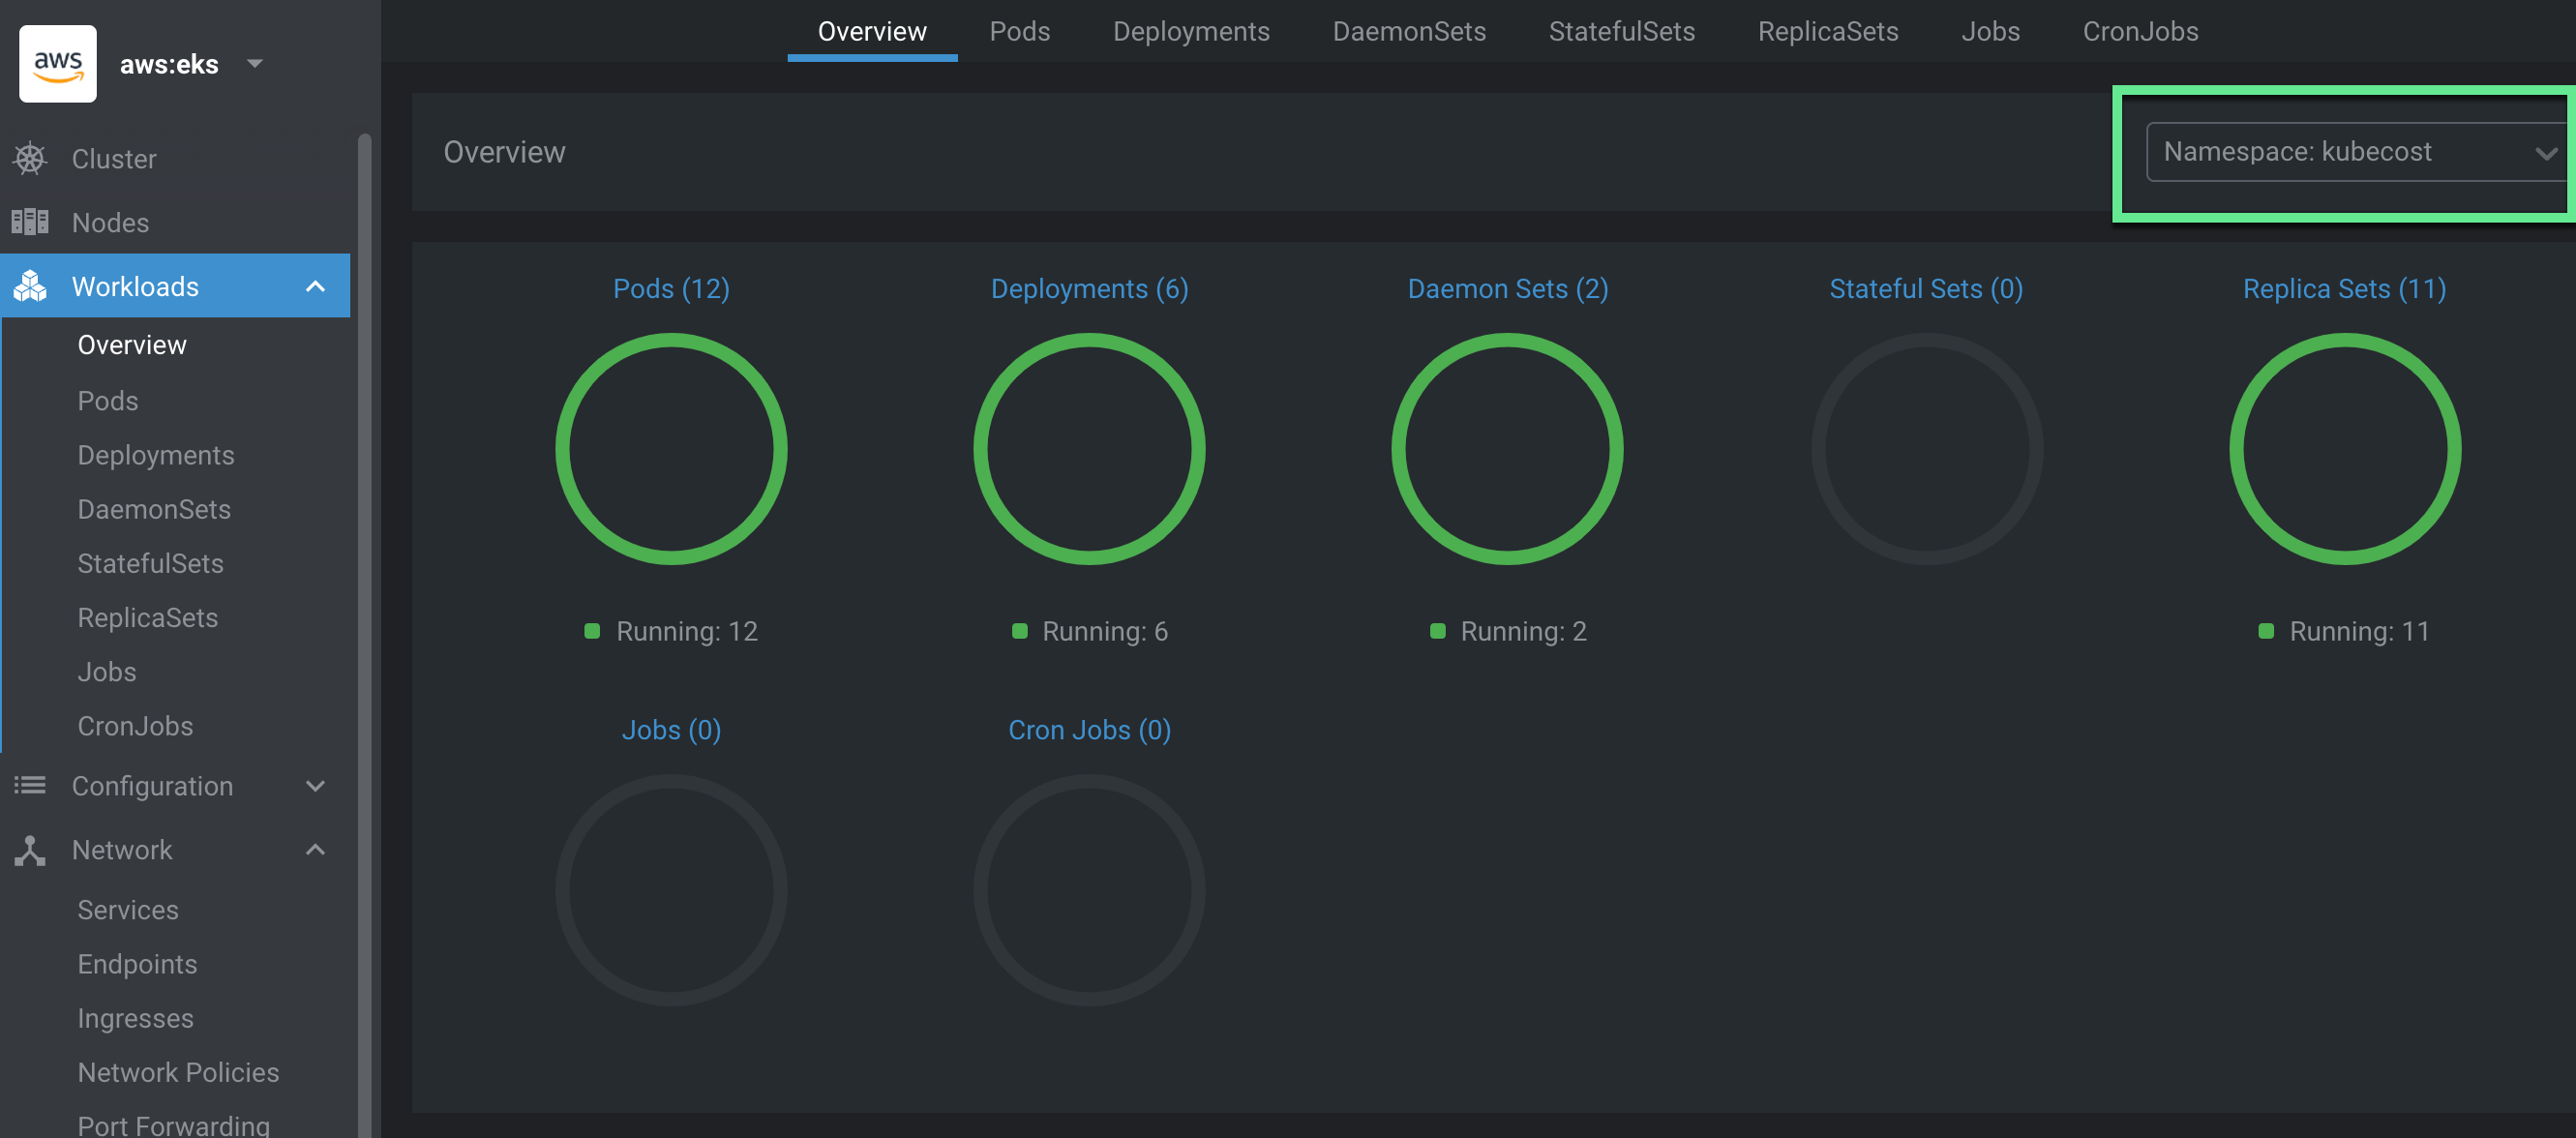
Step 6: Verify your Kubecost release is available and view objects
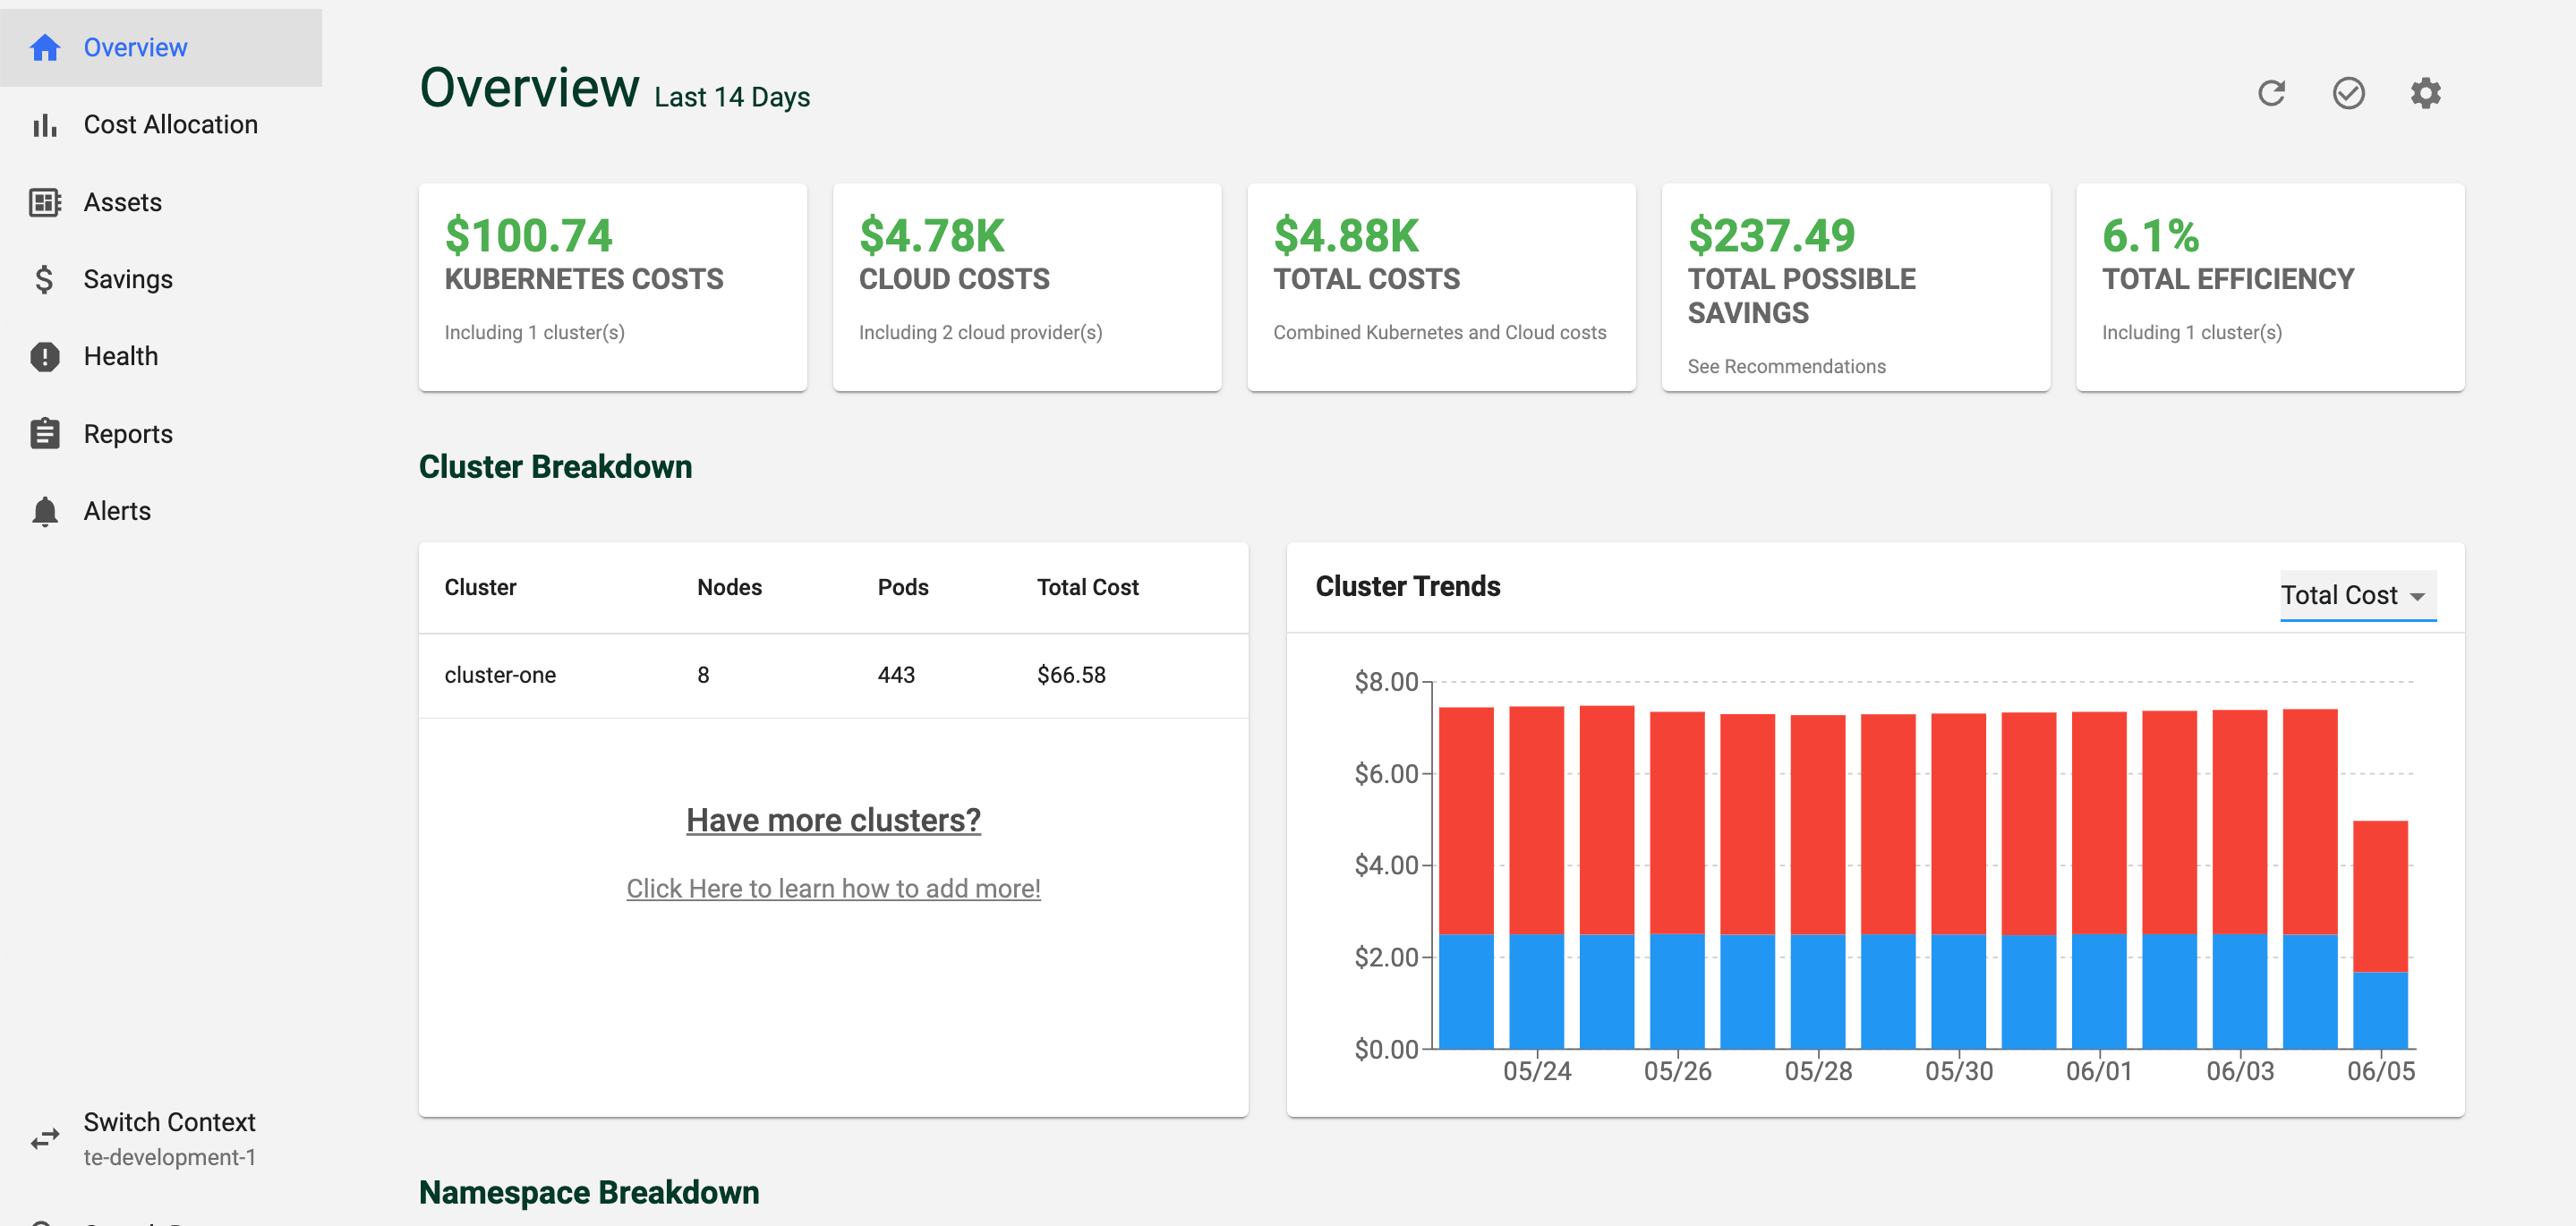
Within Lens, click on “Workloads”. Select the Kubecost namespace to see all the Kubenetes objects that have beeen instaled via the Helm release. You should see all green. If you see any workloads that are unavailable, your cluster may not have enough resources to run Kubecost.
Step 7: Using the “Helm/Release” section of Lense to manage your Kubecost release
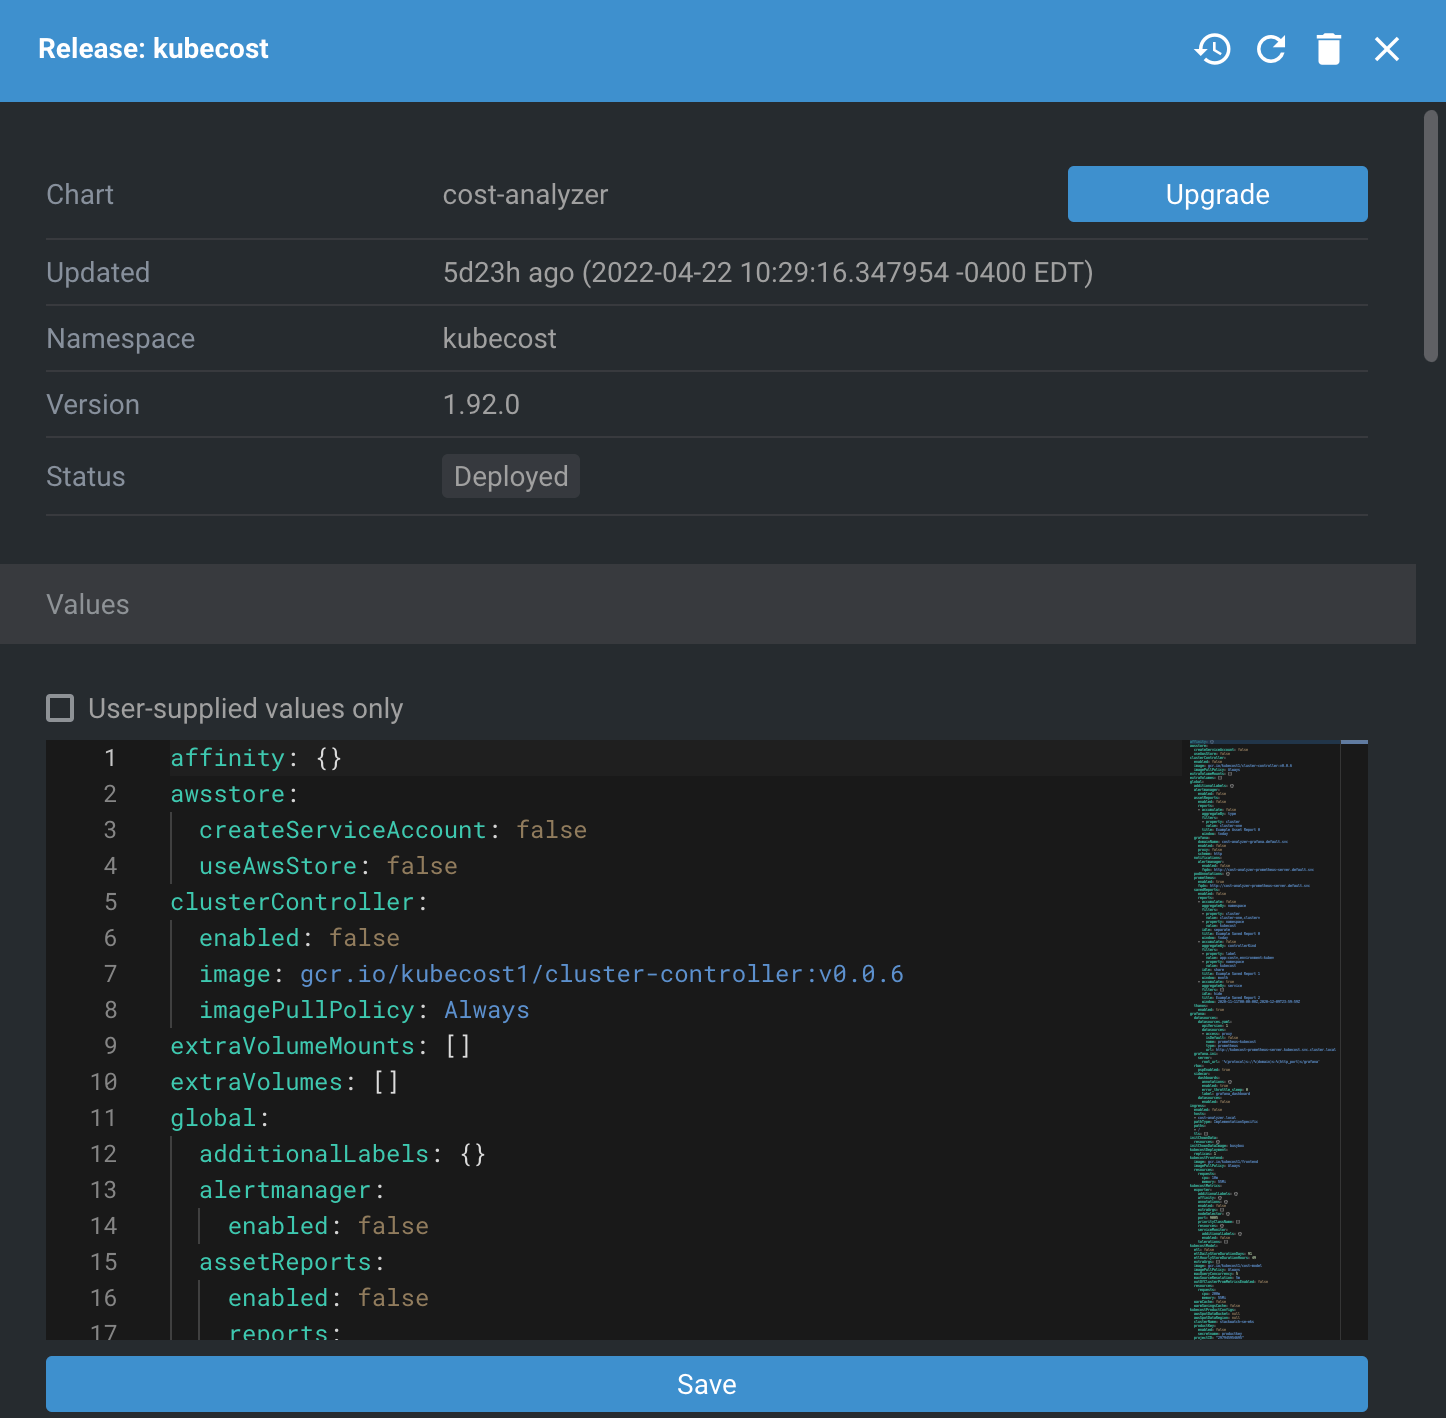
Once Kubecost is available, you can click on “Helm/Releases” to see your release within Lens.
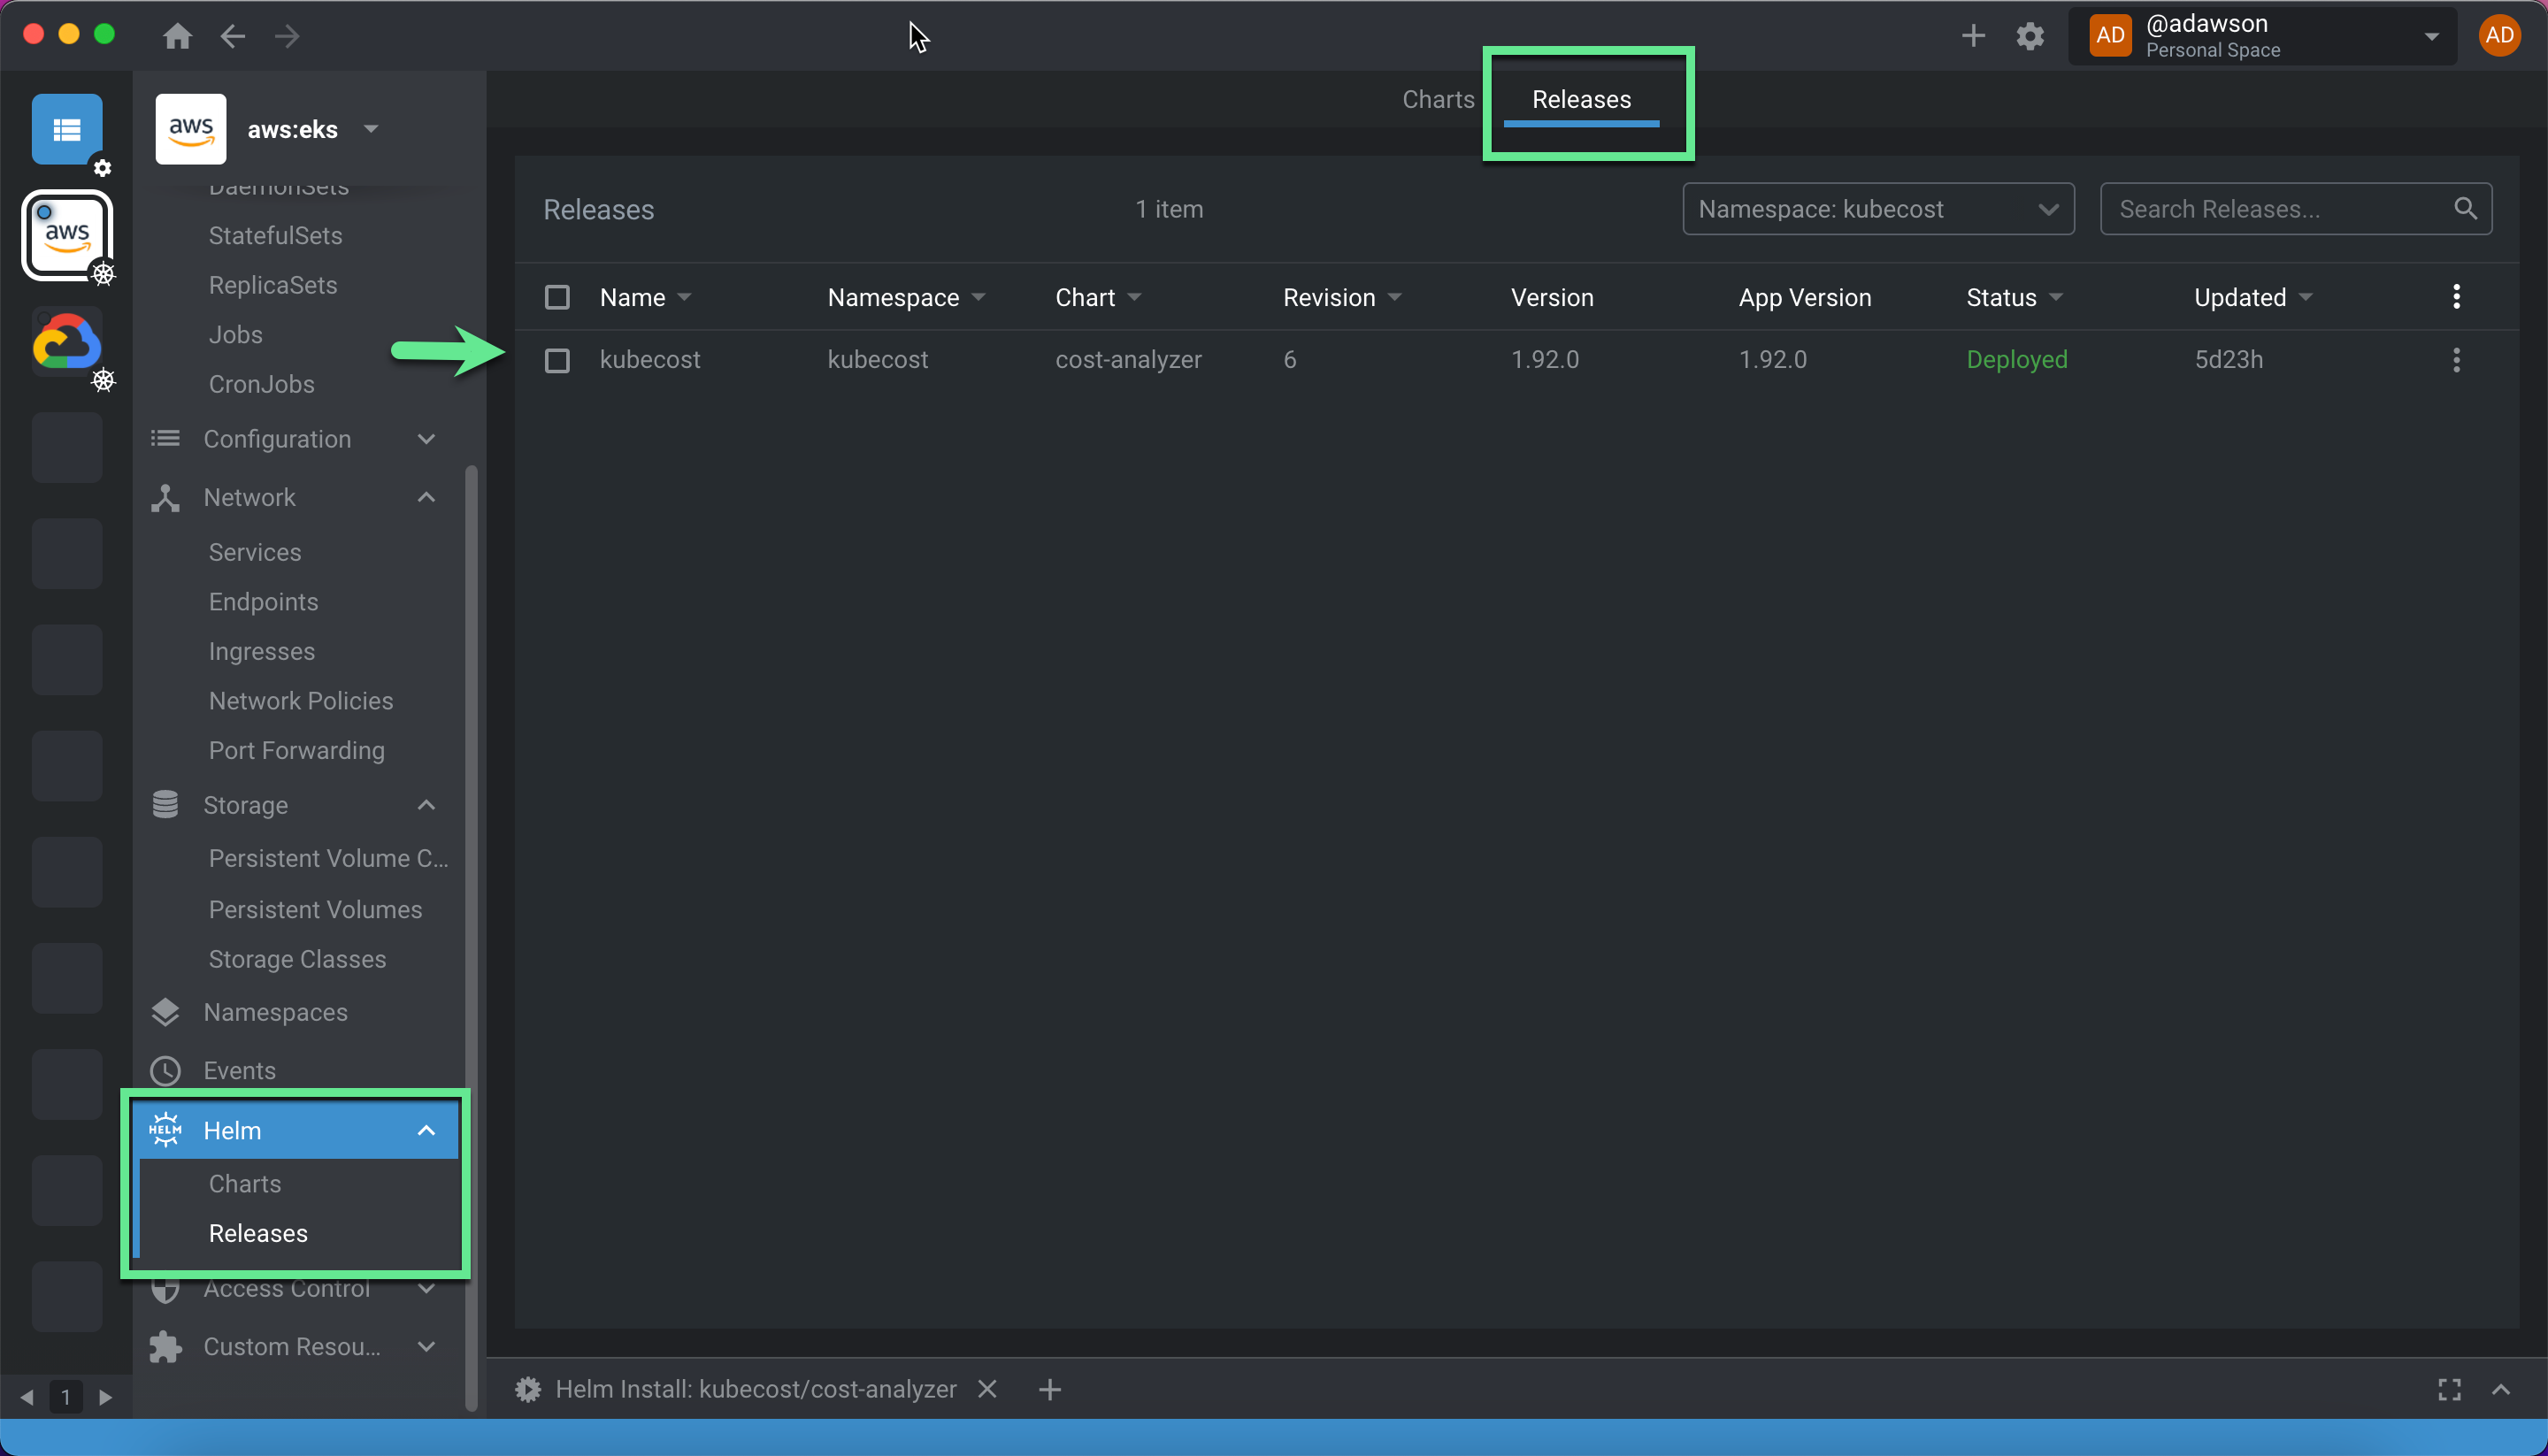
The Helm Release section allows you to update the Kubecost version and Helm values easily. Advanced options can be configured through the values file, like bringing in external non-k8s cloud costs from AWS, GCP and Azure accounts, SSO setup, and more.
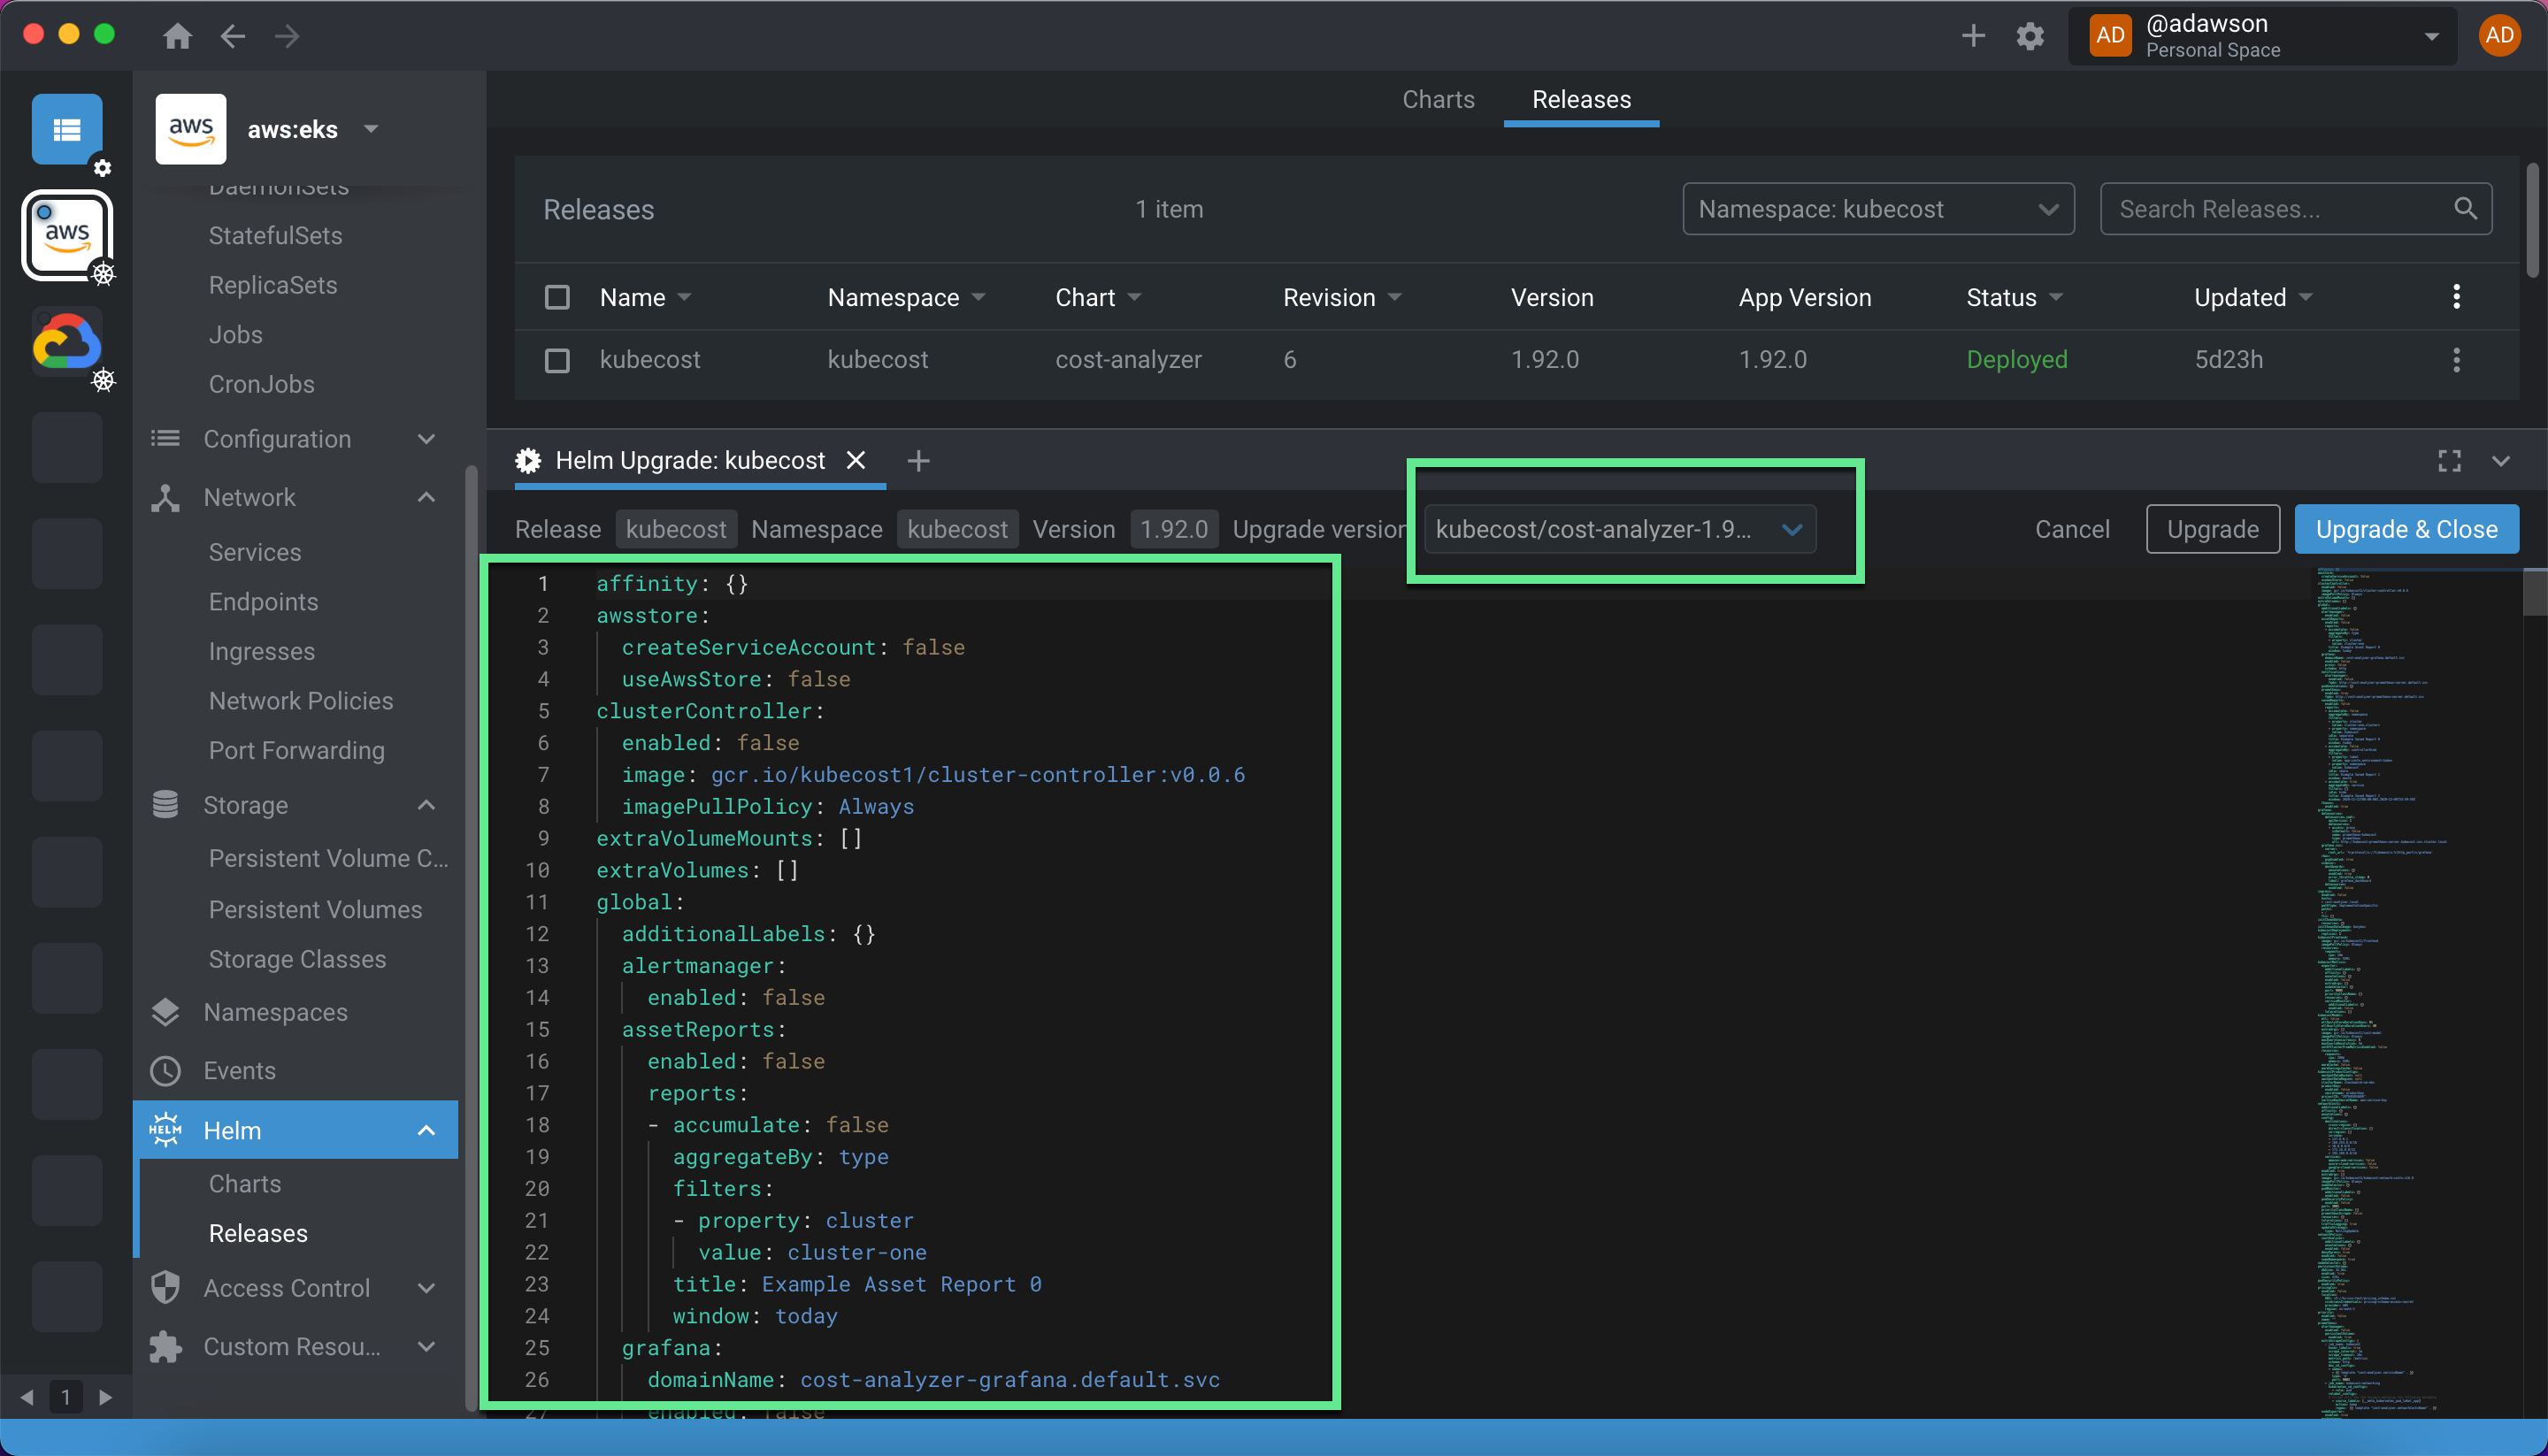
Under Helm → Releases, click on the right side drop down menu and select Upgrade. This pop up screen allows you to add and edit Helm Values right within Lens, as well as upgrade your Kubecost version to the latest release by selecting it from the “Upgrade version” drop down.
Step 8: Access Kubecost using port forwarding through Lens
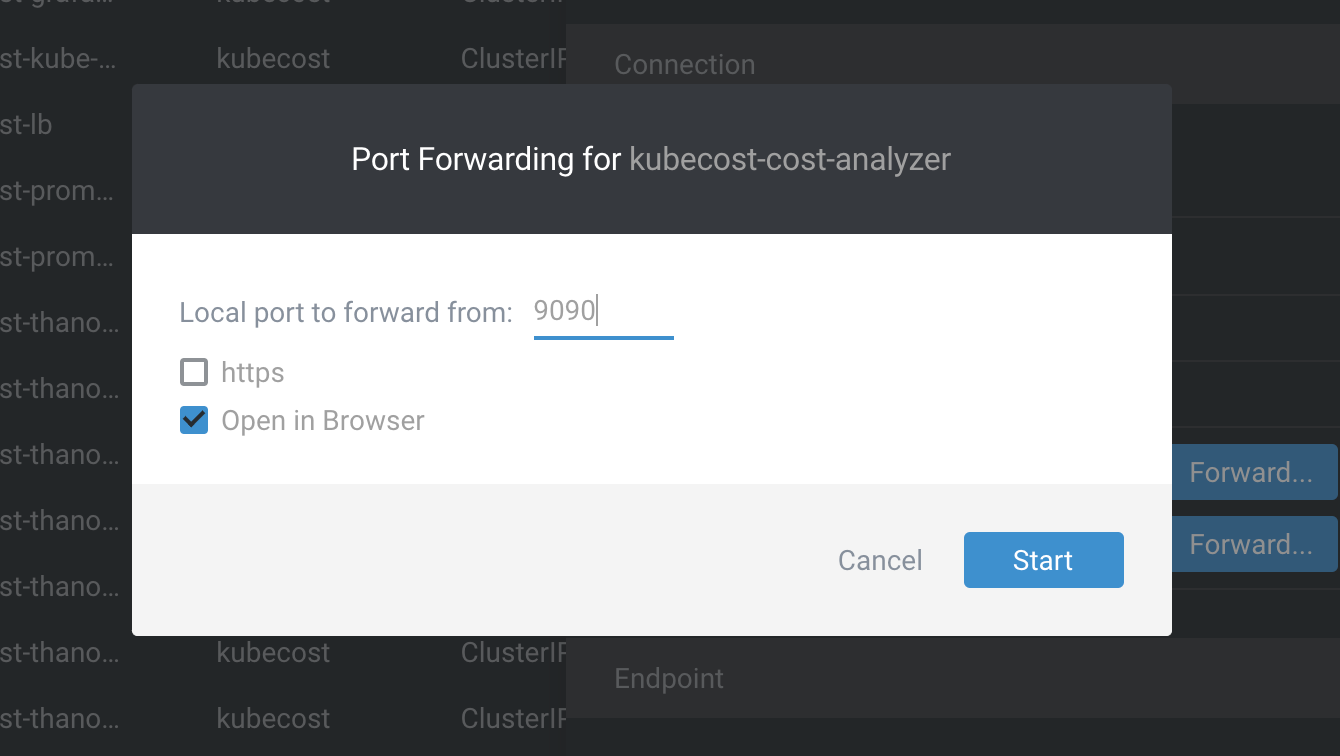
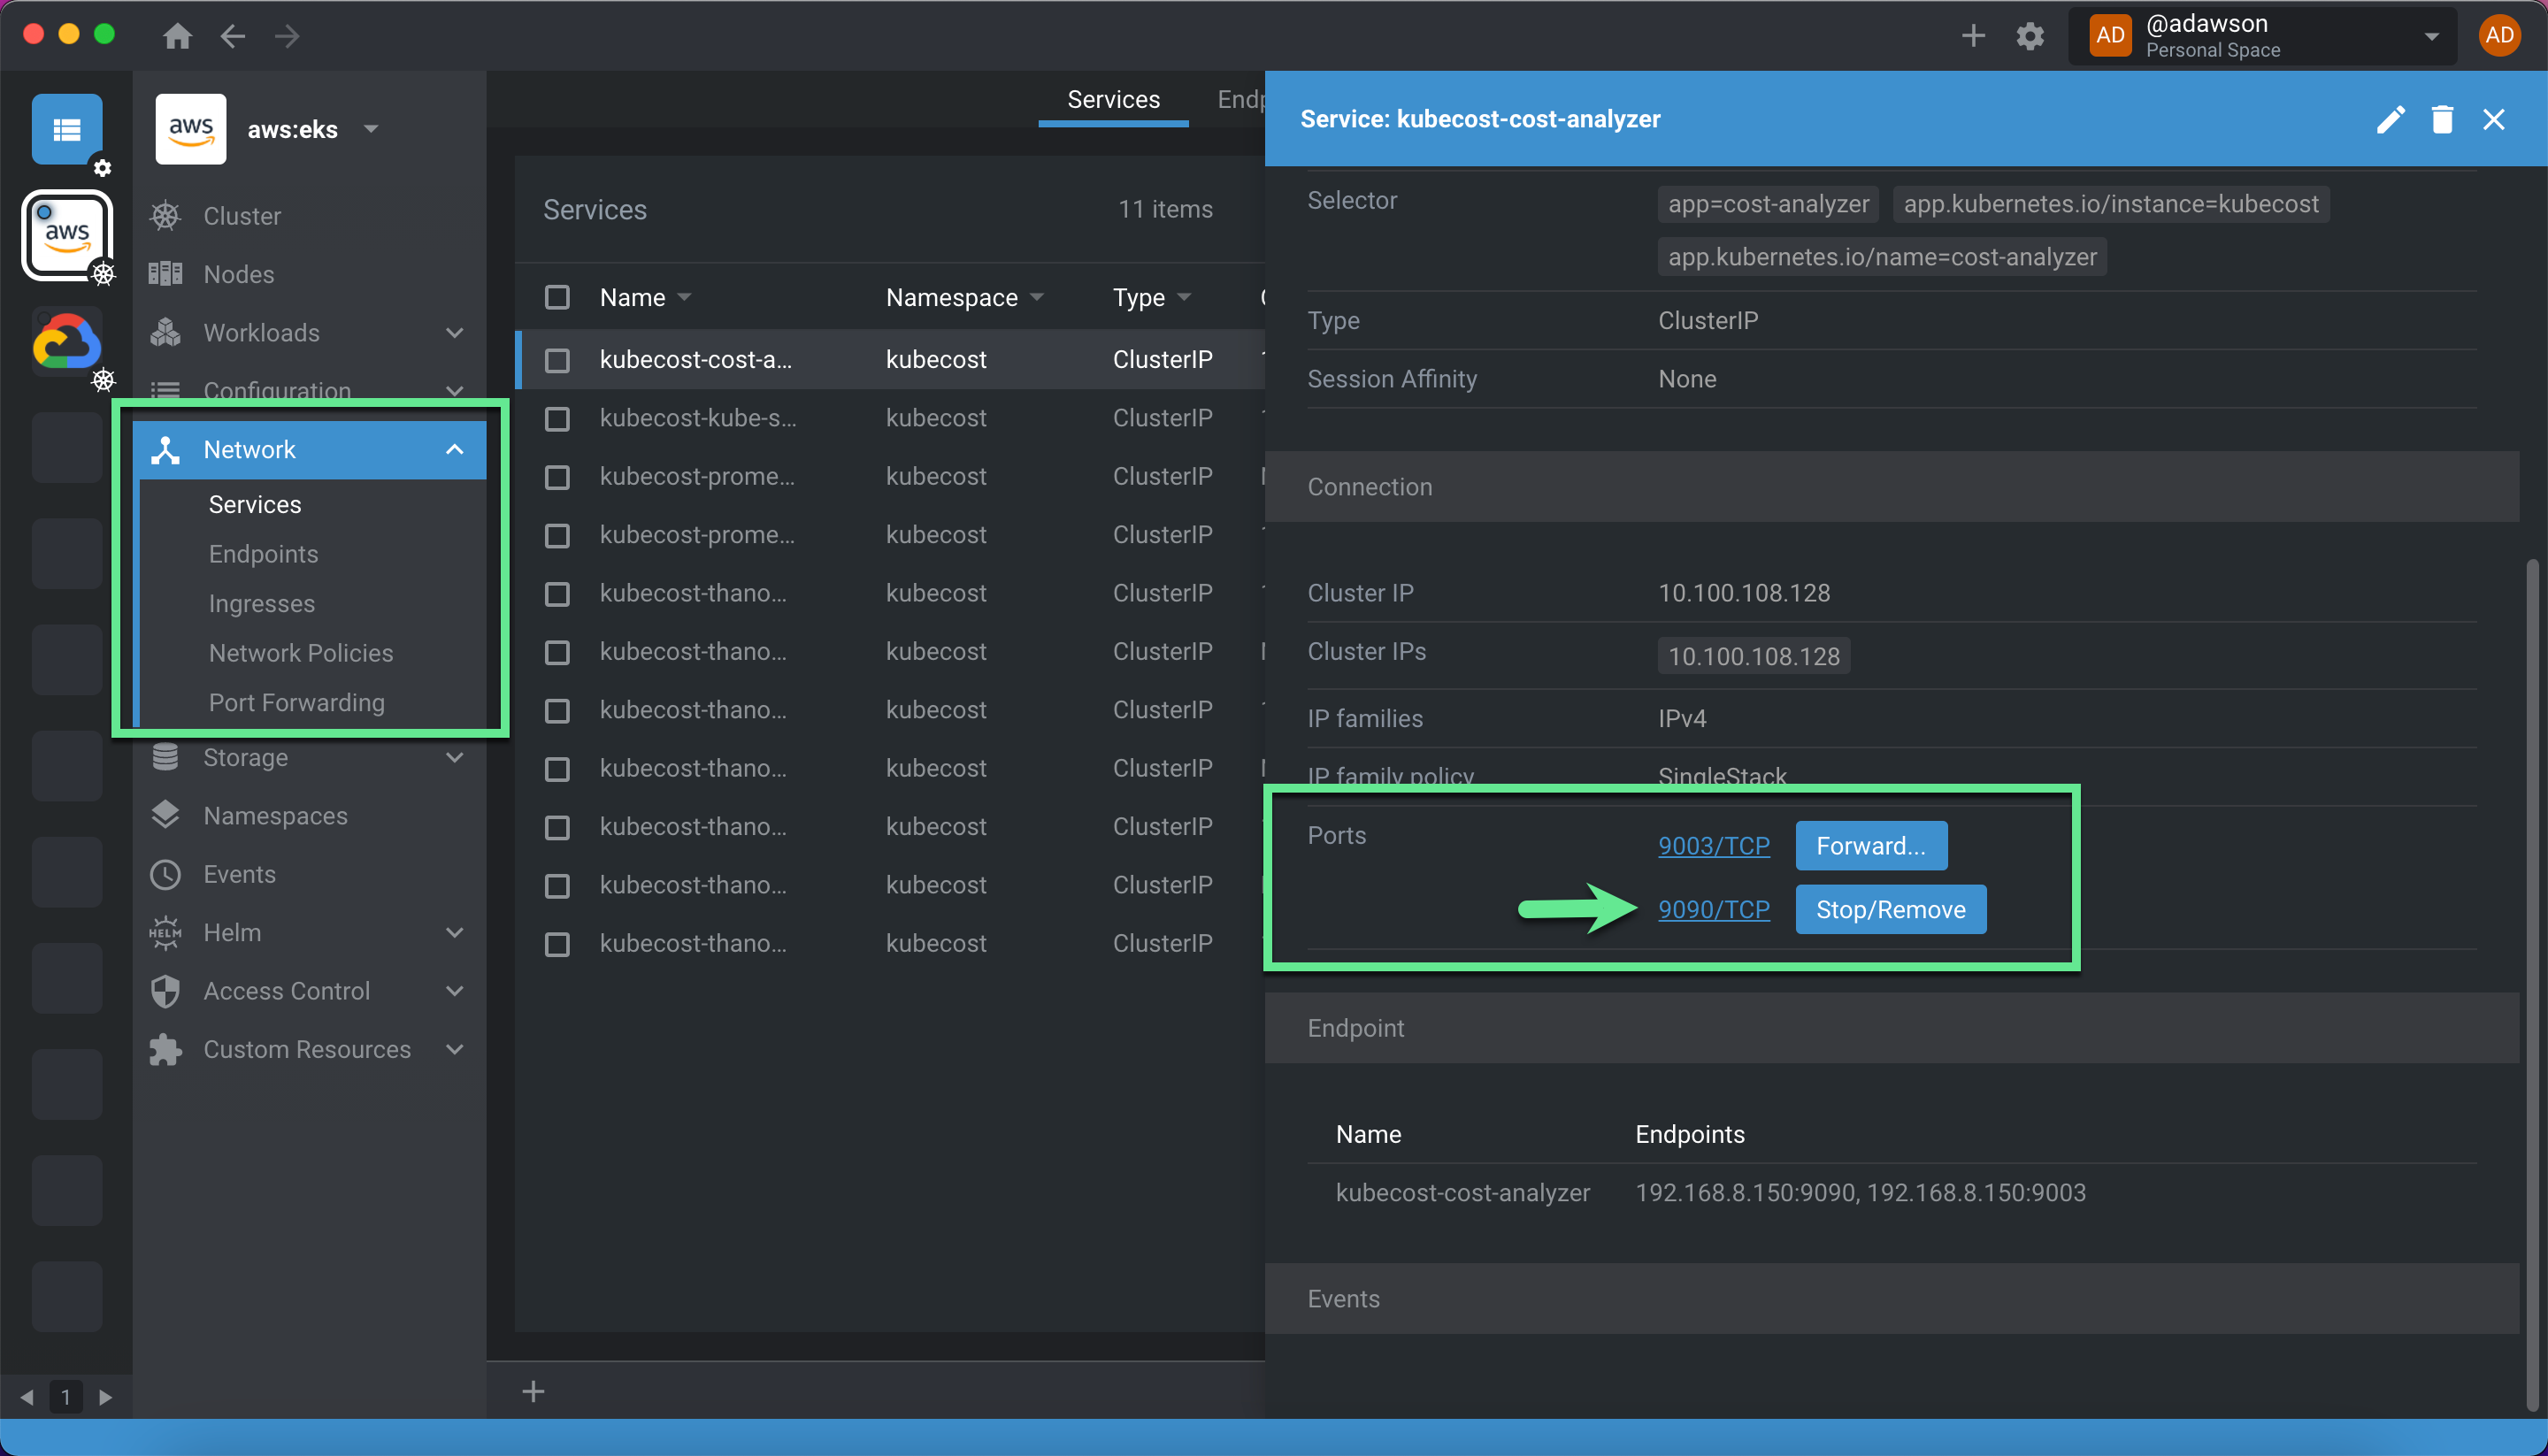
To access Kubecost, go to “Services” and fine the kubecost-cost-analyzer service. Scroll down, and find the “Connection/Ports” section. You can click “Forward” and set the port to 9090.

If you have multiple clusters, they can’t all use port 9090. In this case, you can use a randomized port. To do this, click on the link text for ‘Port 9090’ directly.
Kubecost will open on a randomized port. Copy the url from the URL bar and paste it into the “Add New Cluster”
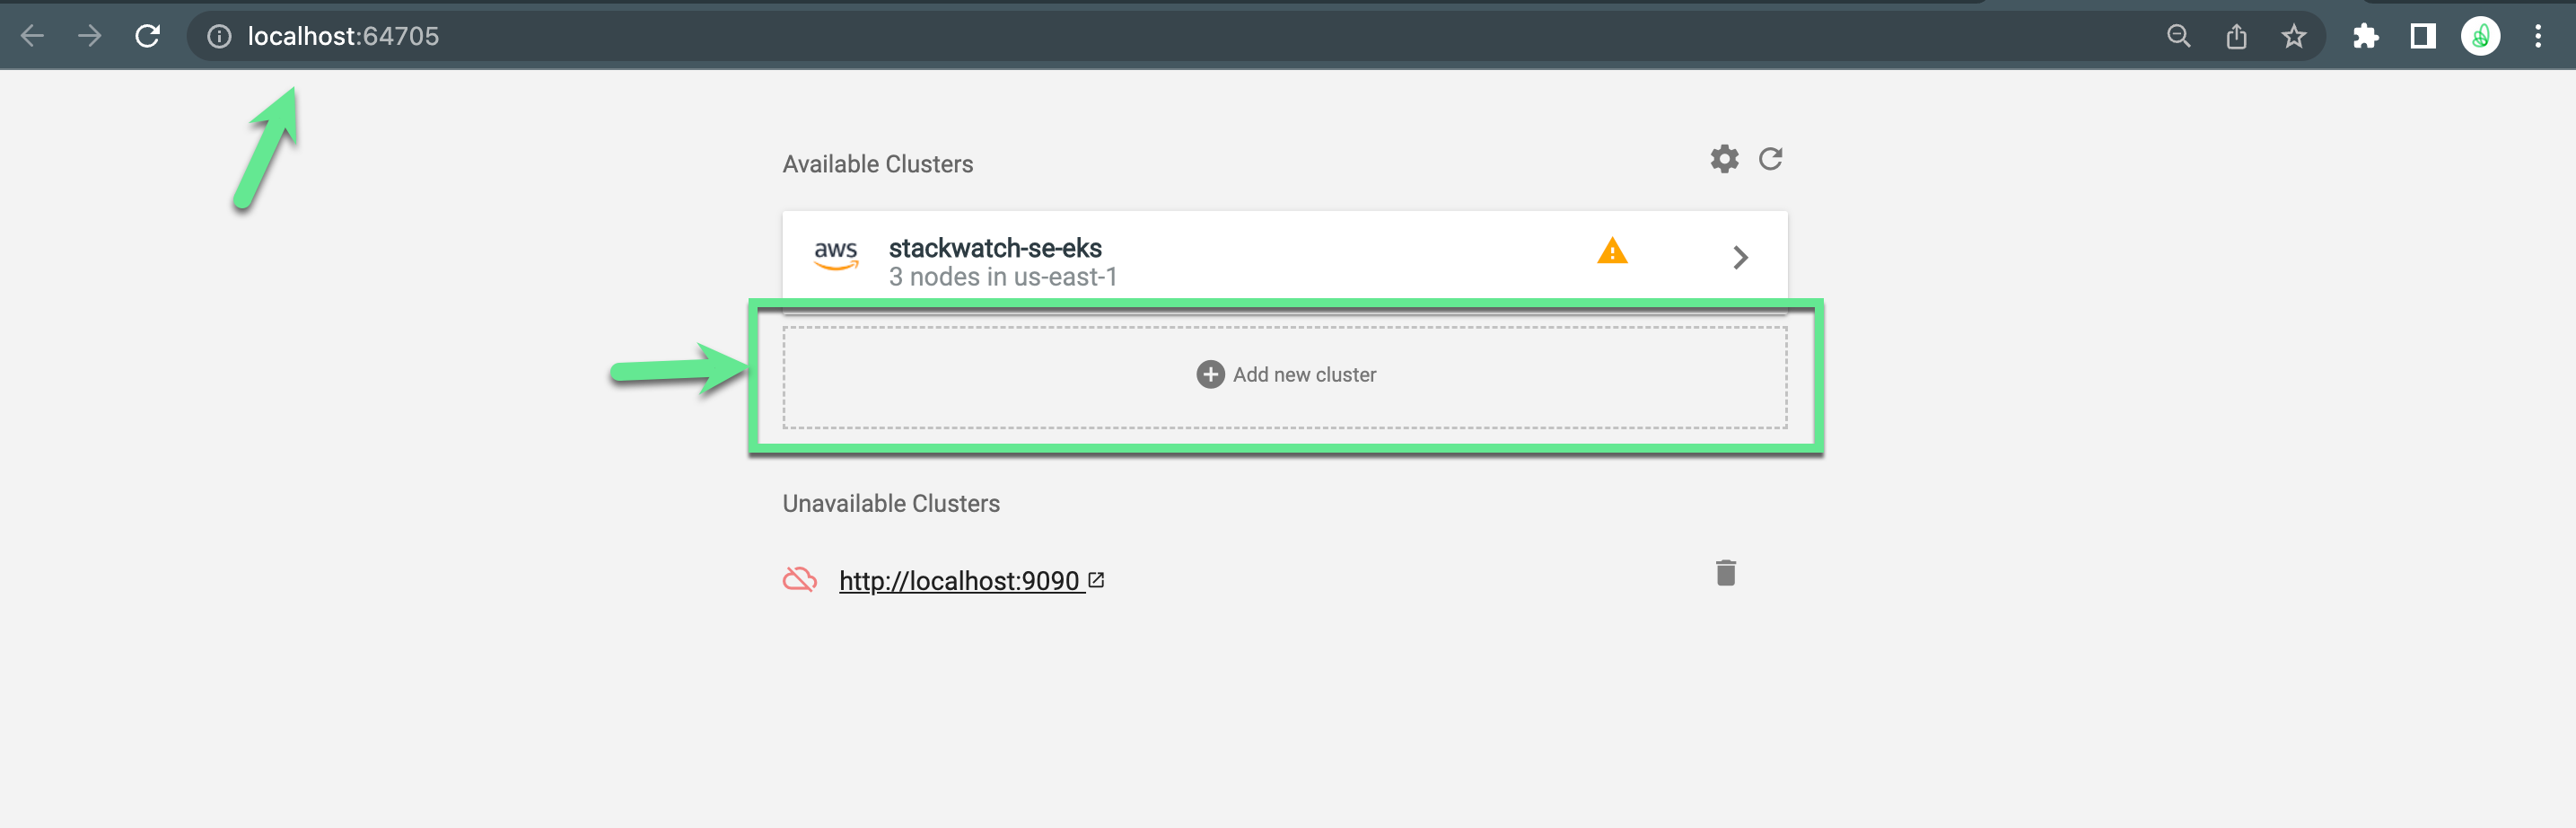
You will now be able to access your cluster! The Kubecost core version is free forever on one individual cluster per company, with 15 day metric retention. Kubecost Enterprise provides federated views for multiple clusters, SSO, unlimited metrics, and dedicated support.
We’re here to help!
Join us on Slack if have questions or feedback, need help, or for general Kubernetes and cloud cost optimization conversation!